
In this Photoshop tutorial, we’ll
learn how to create the illusion that a single photo is being displayed
as a series of vertical panels. It may look complicated, but as we’ll
see, it’s actually a very easy effect to create, with most of the steps
being simple repetition. This version of the tutorial has been
completely re-written and updated for Photoshop CS6 and is also fully
compatible with Photoshop CC (Creative Cloud). If you’re using Photoshop
CS5 or earlier, you’ll want to check out the original Vertical Photo Panels Effect tutorial.


Notice that both the Drop Shadow and Stroke effects are listed directly below the Panel layer. That’s great, except we don’t really need to see them and, in fact, they’re just taking up space. Let’s hide them by clicking on the small arrow on the far right of the layer:


Download our tutorials as print-ready PDFs! Learning Photoshop has never been easier!

The original image.
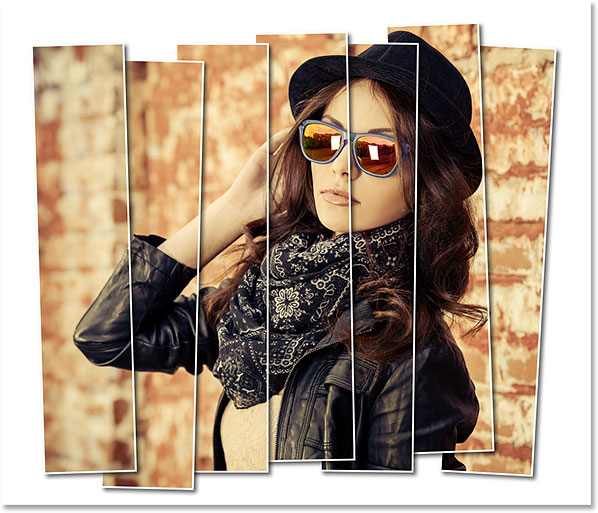
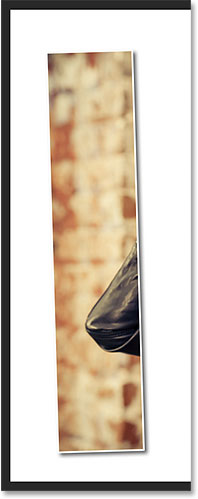
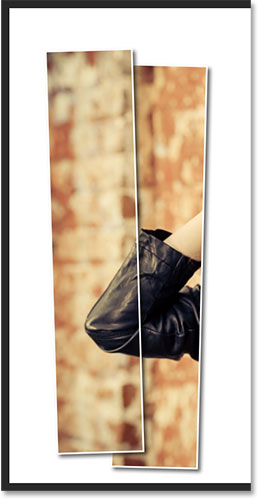
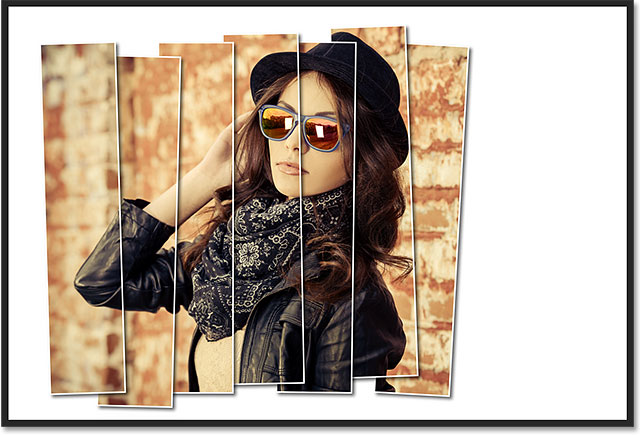
And here’s what the final “photo panels” effect will look like:
The final effect.
Step 1: Add A White Solid Color Fill Layer
With the image newly opened in Photoshop, let’s begin by adding a white Solid Color fill layer. We’ll be using this layer as the background for the effect. Click on the New Fill or Adjustment Layer icon at the bottom of the Layers panel:
Clicking the New Fill or Adjustment Layer icon.
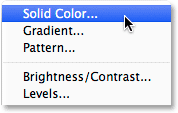
Choose Solid Color from the top of the list of fill and adjustment layers that appears:
Choosing a Solid Color fill layer.
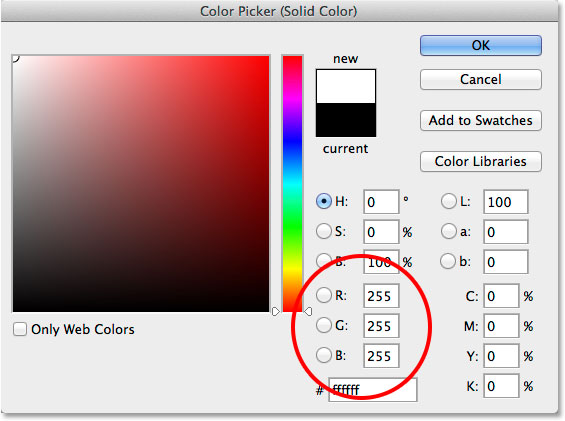
Photoshop pops open the Color Picker so we can choose a color for the fill layer. I’m going to go with white for my background. One way to choose white in the Color Picker is by entering 255 for the R, G and B values:
Choosing white in the Color Picker.
Click OK to close out of the Color Picker. Your document
will appear filled with white, temporarily blocking the image from view.
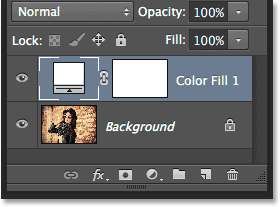
If we look in the Layers panel, we see the new Solid Color fill layer
(named “Color Fill 1″) sitting above the image on the Background layer:
The Layers panel showing the fill layer above the image.
Step 2: Turn Off The Solid Color Fill Layer
We don’t need to see the Solid Color fill layer just yet, and in fact it’s only going to get in the way if we leave it on, so let’s turn it off temporarily. To do that, click on the layer visibility icon (the “eyeball” icon) at the far left of the layer in the Layers panel. This will hide the layer in the document, making the original image visible once again:
Clicking the visibility icon for the fill layer.
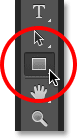
Step 3: Select The Rectangle Tool
To draw the vertical panels, we’ll use the Rectangle Tool, one of Photoshop’s basic Shape tools, which we can select from the Tools panel along the left of the screen:
Selecting the Rectangle Tool.
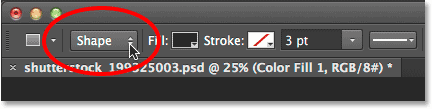
Step 4: Set The Tool Mode To Shape
With the Rectangle Tool selected, make sure the Tool Mode option at the far left of the Options Bar along the top of the screen is set to Shape, not Path or Pixels:
Setting the Tool Mode for the Rectangle Tool to Shape.
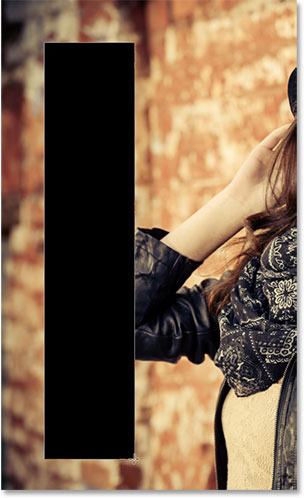
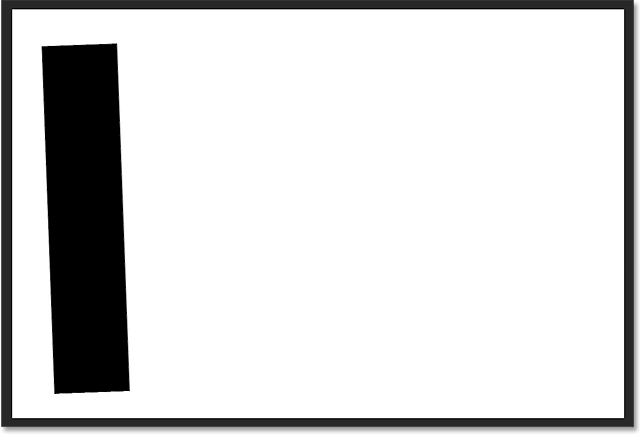
Step 5: Draw The First Panel
With Shape selected in the Options Bar, click inside your document and drag out the first vertical panel. We’ll be adding the panels from left to right, so start over on the left. Don’t worry about the color of the panel because we won’t be seeing it for much longer:
Drawing the first panel along the left of the image.
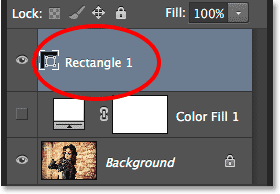
Step 6: Rename The Shape Layer To “Panel”
If we look again in the Layers panel, we see the Shape layer sitting above the other two layers. By default, Photoshop names the Shape layer "Rectangle 1" which, as names go, isn’t all that useful:
The new Shape layer with its default name.
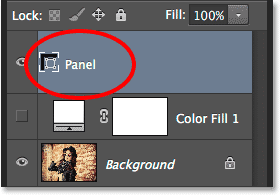
Since we’re using the shape as our panel, double-click directly on the name “Rectangle 1″ to highlight it, then rename it “Panel”. Press Enter (Win) / Return (Mac) to accept the name change:
The Shape layer with its new name.
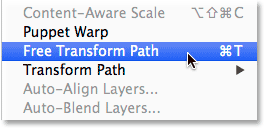
Step 7: Rotate The Panel With The Free Transform Path Command
Let’s rotate the shape to give it a bit more visual interest. Go up to the Edit menu in the Menu Bar along the top of the screen and choose Free Transform Path. Or, you can access Free Transform Path by pressing Ctrl+T (Win) / Command+T (Mac) on your keyboard. In fact, this shortcut will come in very handy a bit later:
Going to Edit > Free Transform Path.
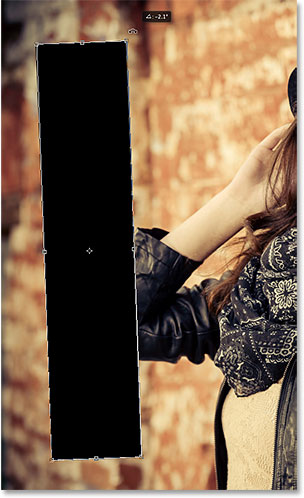
This places the Free Transform box and handles (the little
squares) around the panel. Move your mouse cursor anywhere outside of
the panel. When you see the cursor change into a curved, double-sided arrow, click and drag with your mouse to rotate the panel. Here, I’ve rotated mine counterclockwise. When you’re done, press Enter (Win) / Return (Mac) on your keyboard to accept it:
Rotating the panel with the Free Transform Path command.
Step 8: Turn The Fill Layer Back On
Now that we’ve added our first vertical panel, let’s turn the white fill layer back on. Click once again on the fill layer’s visibility icon (the empty square where the eyeball used to be):
Clicking again on the fill layer’s visibility icon.
With the layer turned on, the solid white background once
again blocks the image from view, with only the vertical panel visible
in front of it:
The document with the white fill layer once again visible.
Step 9: Open The Blending Options
Next, we’ll make the image visible inside the panel, and we’ll add a couple of layer styles to it as well. Click on the small menu icon in the upper right corner of the Layers panel:
Clicking the Layers panel menu icon.
Choose Blending Options from the menu that appears:
Selecting Blending Options from the Layers panel menu.
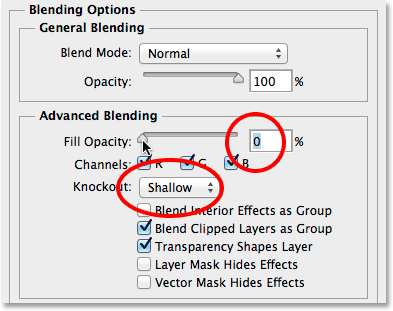
This opens the Layer Style dialog box set to the Blending
Options in the middle column. First, to make the image visible inside
the panel, change the Knockout option in the Advanced Blending section from None to either Shallow or Deep (I’ll choose Shallow but either one will work for our purposes here). Then, lower the Fill Opacity all the way down to 0%:
Setting Knockout to Shallow and the Fill Opacity to 0%.
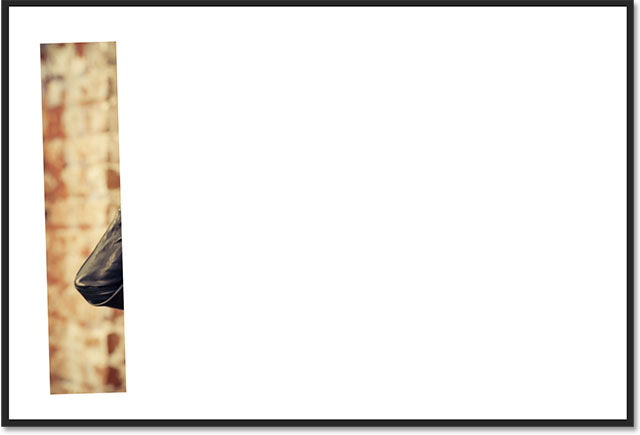
The image now appears through the panel in the document:
The photo is now visible inside the panel area.
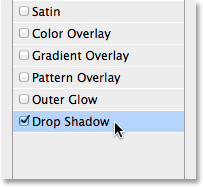
Step 10: Add A Drop Shadow To The Panel
To make the panel stand out a bit more, we’ll add a couple of layer effects (styles). First, click on the words Drop Shadow at the bottom of the list of effects on the left of the Layer Style dialog box:
Selecting Drop Shadow in the list of layer effects.
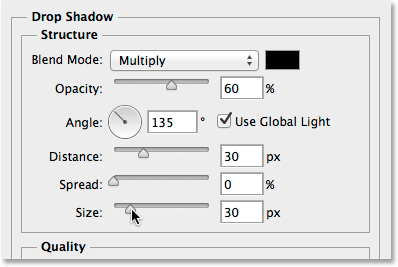
In the Drop Shadow options in the middle column, lower the Opacity of the shadow to around 60%, then set the Angle to 135° so the light appears to be shining from the upper left. Select Use Global Light if it isn’t checked already. Finally, increase the Distance and Size
of the shadow to your liking, which will depend a lot on the size of
the image you’re working with. The Distance value controls how far out
the shadow extends from the object, while the Size value controls the
softness of the shadow’s edges. In my case, I’m using a fairly large
image, so I’ll set both the Distance and Size to around 30px. Again, you
may want to experiment with these values depending on your image size:
The Drop Shadow options.
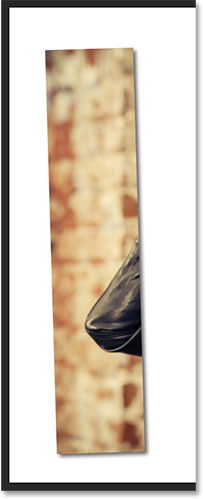
Here’s what my panel looks like with the drop shadow applied:
The panel after applying the drop shadow.
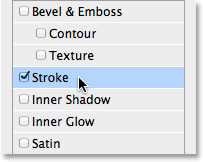
Step 11: Add A Stroke To The Panel
With the Layer Style dialog box still open, click on the word Stroke in the list of effects on the left:
Selecting Stroke in the list of layer effects.
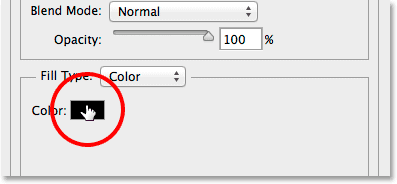
In the Stroke options in the middle column, click on the color swatch to change the color of the stroke:
Clicking the color swatch.
This once again opens the Color Picker, this time allowing
us choose a new color for the stroke. Just as I did before, I’ll choose white by entering 255 for the R, G and B values. Click OK when you’re done to close out of the Color Picker:
Choosing white for the stroke color.
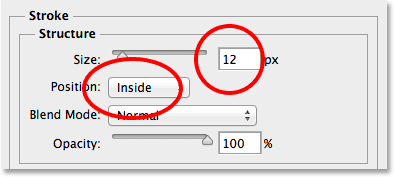
Back in the Layer Style dialog box, change the Position of the stroke from Outside (the default setting) to Inside, then increase the Size
of the stroke by dragging the slider towards the right until you see a
fairly thin yet noticeable white border around the panel. In my case,
I’ll set the Size to 12 px, but you may need a different value depending
once again on the size of your image:
Changing the Position to Inside and increasing the Size value.
Click OK when you’re done to close out of the Layer Style
dialog box. Here’s what my panel looks like with both the drop shadow
and white stroke applied:
The panel after applying both the drop shadow and the stroke.
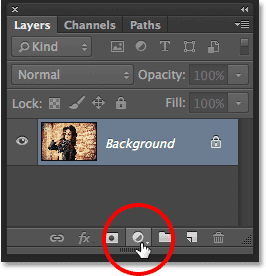
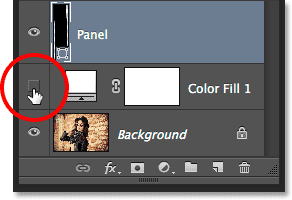
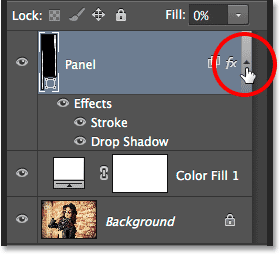
Step 12: Toggle The Layer Effects Closed
At this point, we’ve done the hard work (not that any of it was all that hard, really), and adding the rest of the panels is a simple matter of duplicating, moving and rotating the one we’ve already created. However, all those additional panels means we’re going to end up with several more layers by the time we’re done. So before we do anything else, let’s give ourselves a bit more room in the Layers panel with a small housekeeping task.Notice that both the Drop Shadow and Stroke effects are listed directly below the Panel layer. That’s great, except we don’t really need to see them and, in fact, they’re just taking up space. Let’s hide them by clicking on the small arrow on the far right of the layer:
Clicking the arrow to toggle the layer effects closed.
This toggles the layer effects section closed (clicking the
arrow again will re-open it). The effects themselves are still being
applied to the panel. All we’ve done is cleared away some unnecessary
clutter in the Layers panel itself so we have more room for the other
layers we’re about to add:
The names of the layer effects are no longer taking up space.
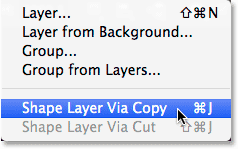
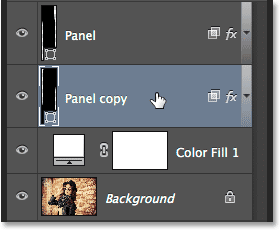
Step 13: Duplicate The Panel Layer
We’re now ready to add our second panel. Make sure the Panel layer is selected in the Layers panel (it should be highlighted in blue). Then duplicate the panel, either by going up to the Layer menu at the top of the screen, choosing New, then choosing Shape Layer via Copy, or by simply pressing Ctrl+J (Win) / Command+J (Mac) on your keyboard:
Going to Layer > New > Shape Layer via Copy.
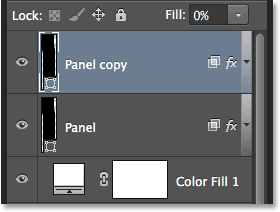
The copy of the Panel layer will appear above the original:
The Layers panel after duplicating the Panel layer.
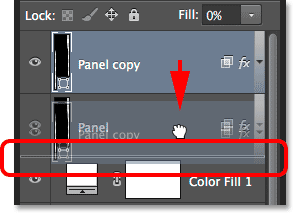
Step 14: Move The Copy Below The Original
Click on the “Panel copy” layer and, with your mouse button still held down, drag it down below the original. A highlight bar will appear between the original Panel layer and the Solid Color fill layer:
Dragging the Panel copy layer below the original.
Release your mouse button when the highlight bar appears to drop the Panel copy layer into place below the original:
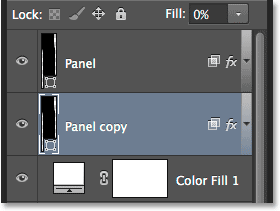
The Panel copy layer now sits below the original Panel layer.
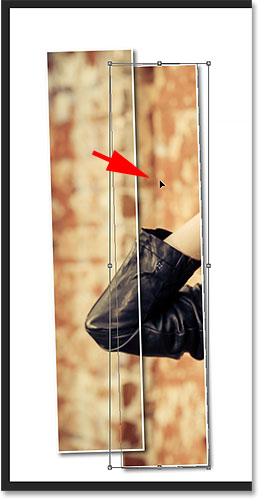
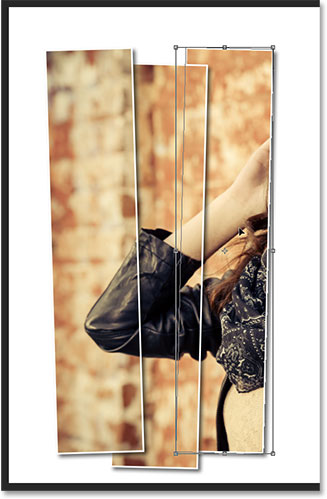
Step 15: Move And Rotate The Copy With Free Transform Path
At the moment, the copy of the panel is sitting behind the original, which means we can’t see it in the document. Let’s move and rotate it, and we can do both of those things with the Free Transform Path command. Just as we did back in Step 7, go up to the Edit menu and choose Free Transform Path, or press Ctrl+T (Win) / Command+T (Mac) to select Free Transform Path from the keyboard:
Going to Edit > Free Transform Path.
To move the new panel, click anywhere inside the Free
Transform box and drag the panel towards the right. For added interest,
move the panel a little higher or lower than the original as well:
Moving the panel to the right of the one above it.
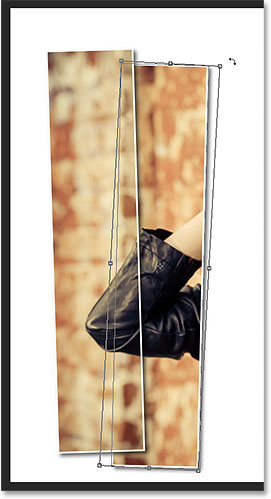
To rotate the panel, move your mouse cursor outside of the Free Transform box. When the cursor changes into a curved, double-sided arrow,
click and drag with your mouse to rotate it. As you add more and more
panels, try to rotate each one on a slightly different angle, with some
tilted to the right and others to the left:
Clicking and dragging to rotate the second panel.
When you’re done, press Enter (Win) / Return
(Mac) to accept it and exit out of the Free Transform Path command.
Don’t worry if you can still see the thin path outline around the panel.
It’s only visible because the panel’s layer is selected in the Layers
panel. If you select a different layer (either the Background or fill
layer), the outline will disappear:
The second panel is now added.
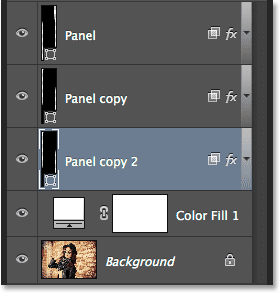
Step 16: Repeat The Same Steps To Add The Other Panels
At this point, all we need to do is repeat the same few steps to add the rest of our panels. We always want the new panel to end up below the others, so first, make sure the bottom-most Panel layer (the one sitting directly above the fill layer) is selected:
Selecting the bottom-most Panel layer.
Then, here’s a great time-saving trick for both copying a
layer and moving it up or down the layer stack at the same time. Press
the Alt (Win) / Option (Mac) key on
your keyboard, and with the key held down, click on the bottom-most
Panel layer and drag it down just a short distance until you see a highlight bar
appear between this layer and the Solid Color fill layer directly below
it. Essentially, you’re dragging the layer below itself:
Press and hold Alt (Win) / Option (Mac) while dragging the bottom Panel layer between itself and the fill layer.
Release your mouse button and a copy of the panel appears right where we want it below the others:
A copy of the layer appears below the original.
With the new panel added, press Ctrl+T (Win) / Command+T (Mac) on your keyboard to quickly select the Free Transform Path
command, then click inside the Free Transform box and drag the new
panel towards the right. Again, for visual interest, move it slightly
higher or lower than the previous panel:
With Free Transform Path active, drag the new panel to the right.
To rotate it, move your mouse cursor outside the Free
Tranform box, then click and drag with your mouse. When you’re done,
press Enter (Win) / Return (Mac) to accept it and exit out of the Free Transform Path command:
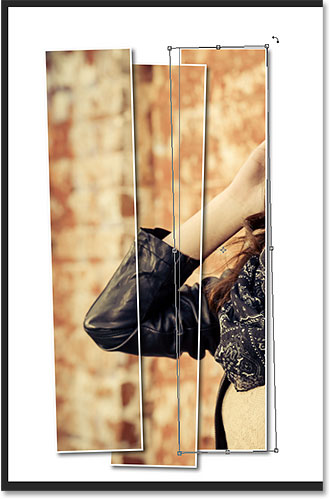
Rotating the new panel.
Then, simply repeat these same steps (the ones I just
covered in Step 16) again to add the rest of your panels. Here’s what my
effect looks like using a total of seven panels:
The effect after adding the rest of the panels.
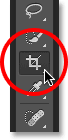
Step 17: Crop The Image
Finally, let’s crop away the unwanted white areas around the panels. Select the Crop Tool from the Tools panel, or press the letter C to select it from the keyboard:
Selecting the Crop Tool.
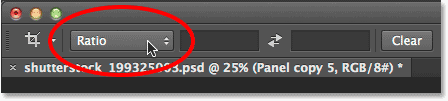
With the Crop Tool selected, set the Aspect Ratio option on the far left the Options Bar to Ratio but leave the two value boxes directly to the right of it empty (or click the Clear
button to clear them if needed). This will allow us to drag out a
freeform crop box rather than being locked into a specific aspect ratio:
Setting the Aspect Ratio option to Ratio.
Very important! For the effect to still work after you’ve cropped the image, make sure you select Delete Cropped Pixels
in the Options Bar. If you don’t select this option, the original image
inside the panels will no longer be visible after the crop:
Selecting Delete Cropped Pixels.
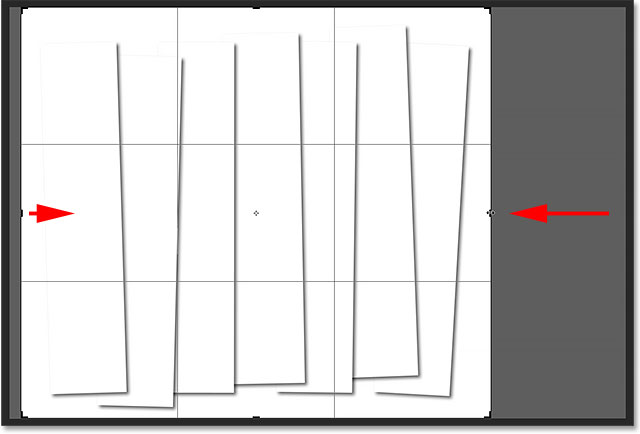
With Delete Cropped Pixels selected, either click and drag
out a new crop box around the area you want to keep or simply resize the
initial crop box as I’m doing here (by dragging the left and right
sides of the crop box in towards the panels). Don’t worry if your
original image disappears for the moment, as mine has. It will reappear
as soon as we’re done:
The image may disappear as you drag the cropping box, but it’s only temporary.
When you’re ready, press Enter (Win) / Return
(Mac) on your keyboard to crop the image. The photo inside the panels
will reappear, giving us our final “vertical phot panels” effect:


