Best Design Tutorials

Free Graphic Design Tutorials and Courses, Design Tutorials provides the best and educational tutorials for your skills improvement

Wikipedia

Search results

Showing posts with label Photoshop tutorial. Show all posts
02:01:00

How to Create a Sci-Fi Space Scene in Photoshop (Step-by-Step Guide)
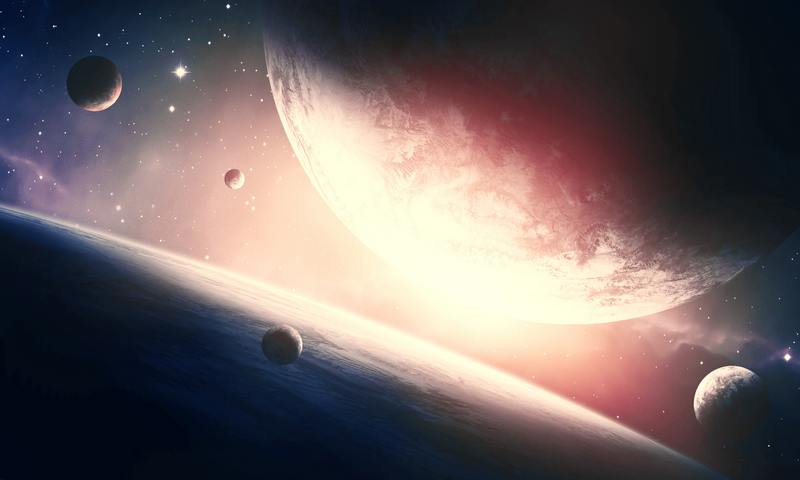
How to Create a Sci-Fi Space Scene With Adobe Photoshop

 In this Photoshop tutorial, I’ll show you how to create a sci-fi planet scene.

You’ll learn how to combine a space background with planets, add shadow and light, enhance the color, and more.


Tutorial Details

  • Program: Photoshop CS3+
  • Estimated Completion Time: 60 minutes
  • Difficulty: Beginner/Intermediate

Resources


Step 1

Create a new 2000×1200 px document in Photoshop and fill it with black. Open the background image and drag it into the black canvas using the Move Tool (V).

How to Create a Sci-Fi Space Scene With Adobe Photoshop 1


Step 2

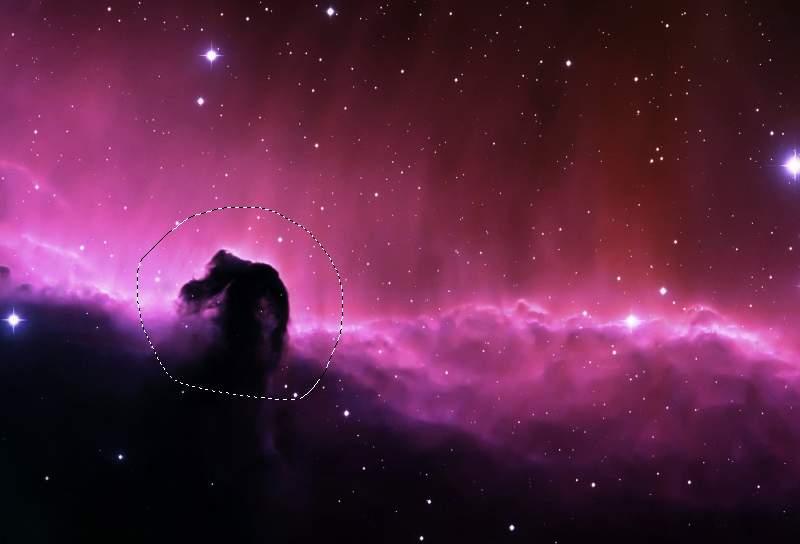
This selected detail will distract the final effect so it should be removed.
How to Create a Sci-Fi Space Scene With Adobe Photoshop 2

To do it, use the Lasso Tool (L) to select a part on the right and set the radius to 30 px :
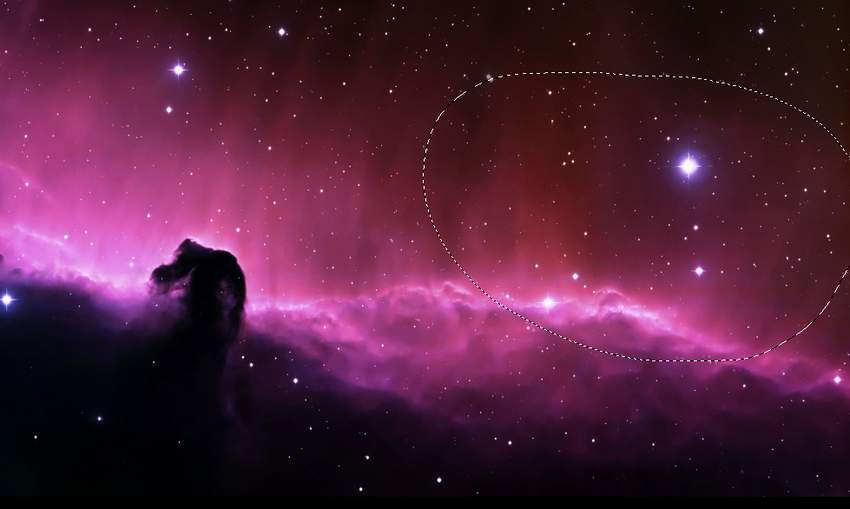
How to Create a Sci-Fi Space Scene With Adobe Photoshop 3

Press Ctrl+J to duplicate the selected area. Move it to the left where the indicated detail located and flip it horizontally (Edit > Transform > Flip Horizontal).
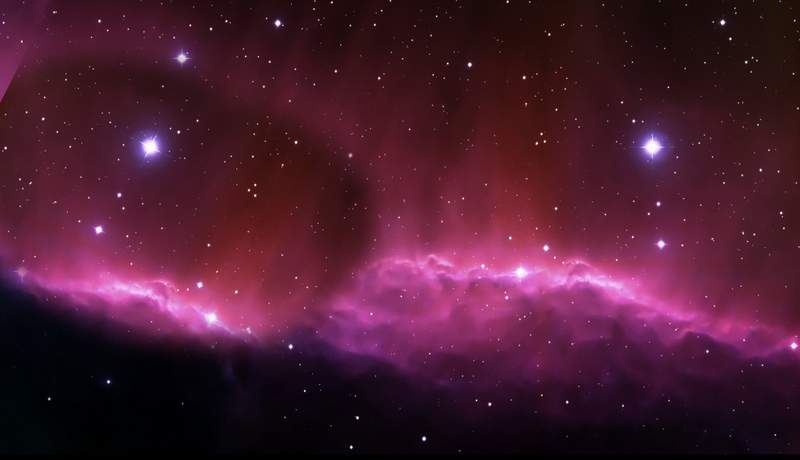
How to Create a Sci-Fi Space Scene With Adobe Photoshop 4


Step 3

Click the second icon at the bottom of the Layers panel to add a mask to this layer. Use a soft black brush to remove the hard edges and blend this part with the existing background.
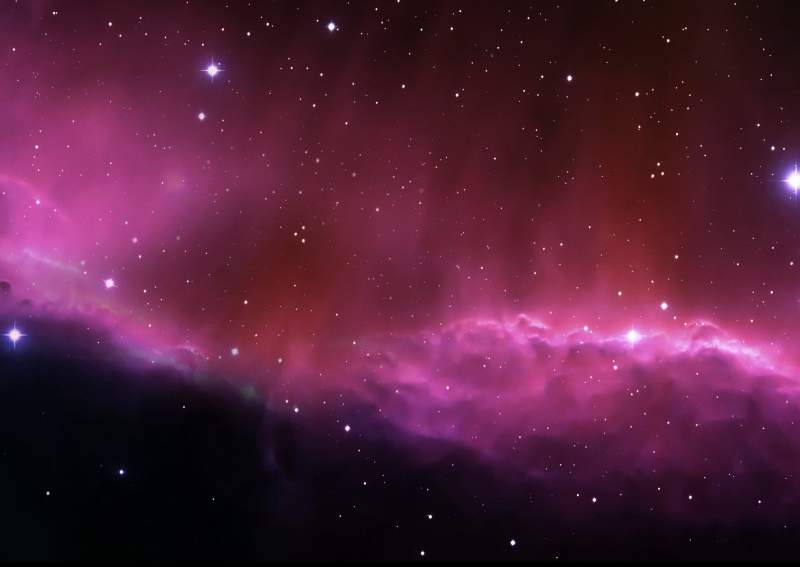
How to Create a Sci-Fi Space Scene With Adobe Photoshop 5


Step 4

This part looks darker than the existing background. To correct it, go to Layer > New Adjustment Layer > Curves and increase the lightness. Set this layer as Clipping Mask.
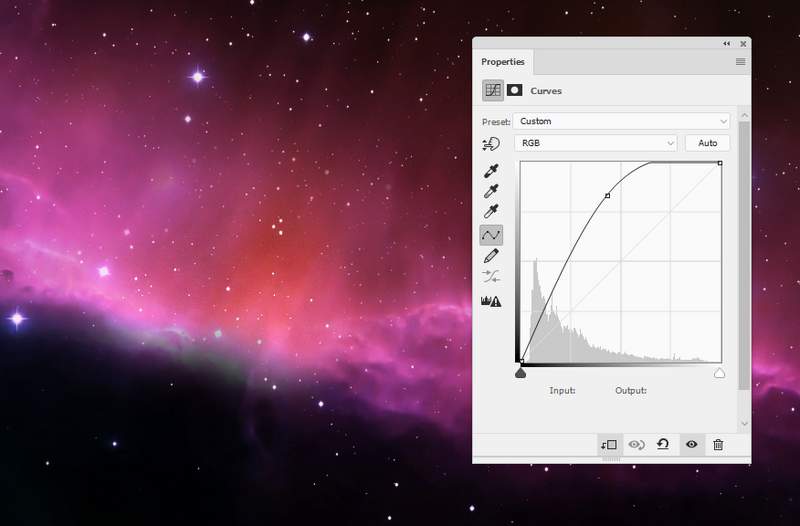
How to Create a Sci-Fi Space Scene With Adobe Photoshop 6


Step 5

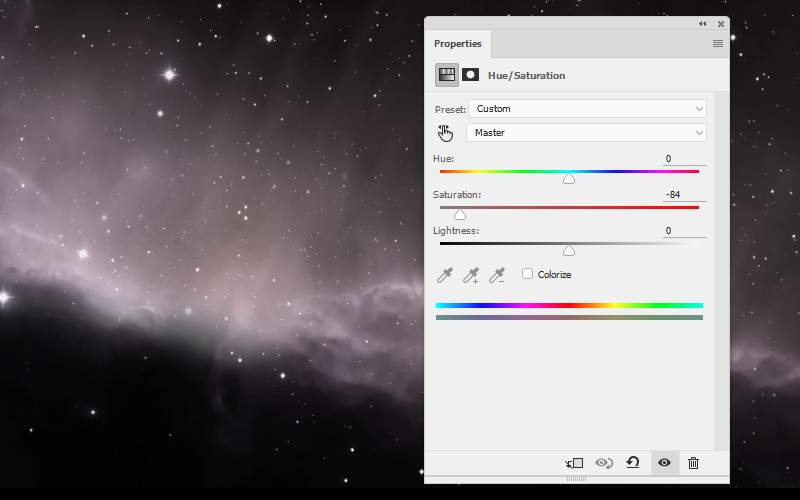
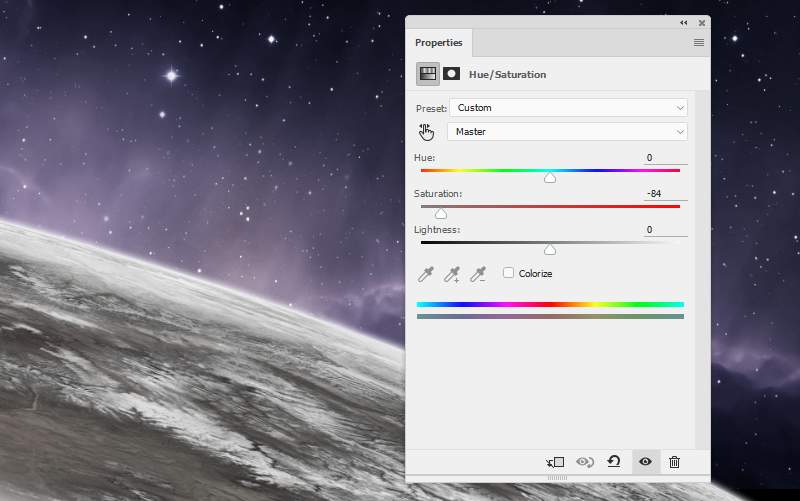
Make a Hue/Saturation adjustment layer and reduce the Saturation value to -84 :
How to Create a Sci-Fi Space Scene With Adobe Photoshop 7


Step 6

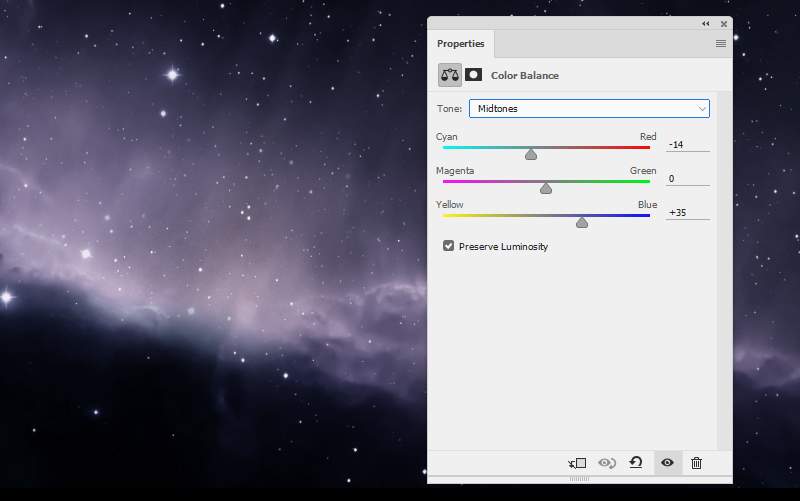
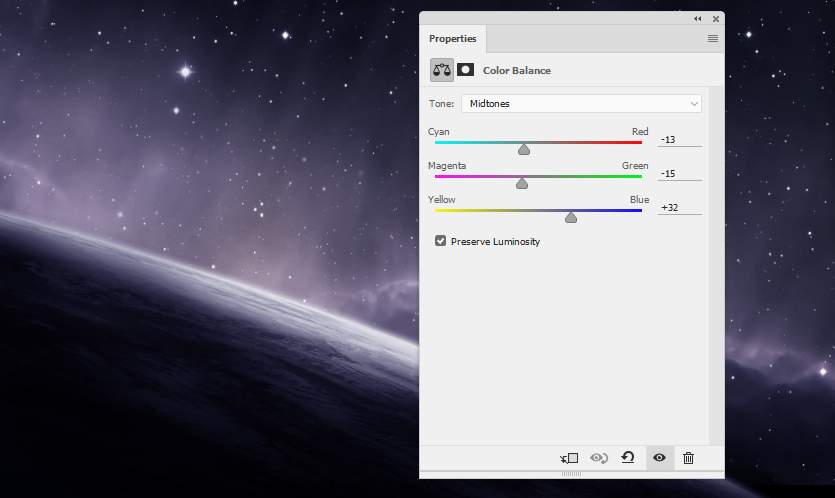
Use a Color Balance adjustment layer to change the background’s color:
How to Create a Sci-Fi Space Scene With Adobe Photoshop 8


Step 7

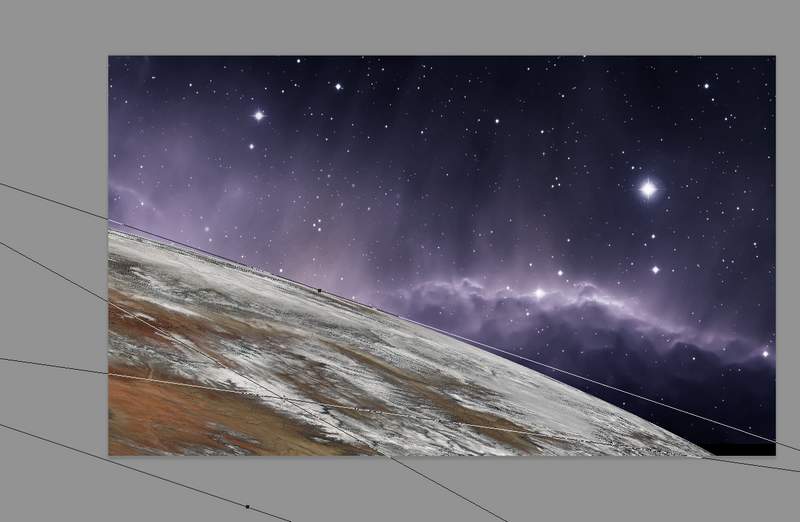
Open the planet texture. You can see how to use this texture to make a planet in the following tutorial:
Create a Sci-Fi Landscape Scene with Photoshop.

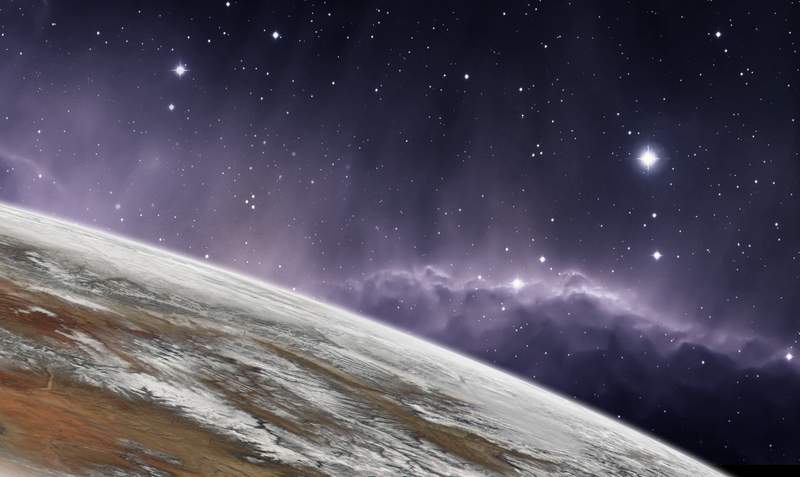
Drag the planet into our main canvas using the Move Tool. Use the Free Transform Tool (Ctrl+T) to stretch the planet a lot and place it in the bottom left.
How to Create a Sci-Fi Space Scene With Adobe Photoshop 9


Step 8

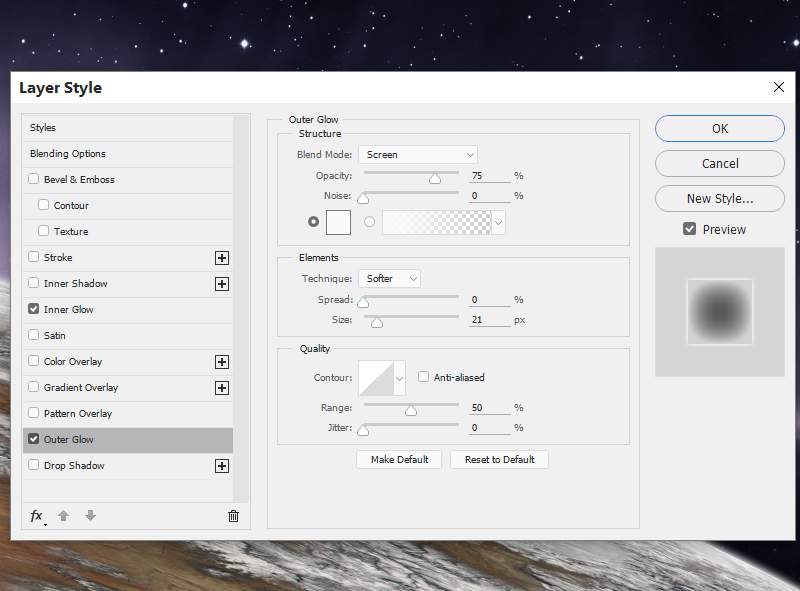
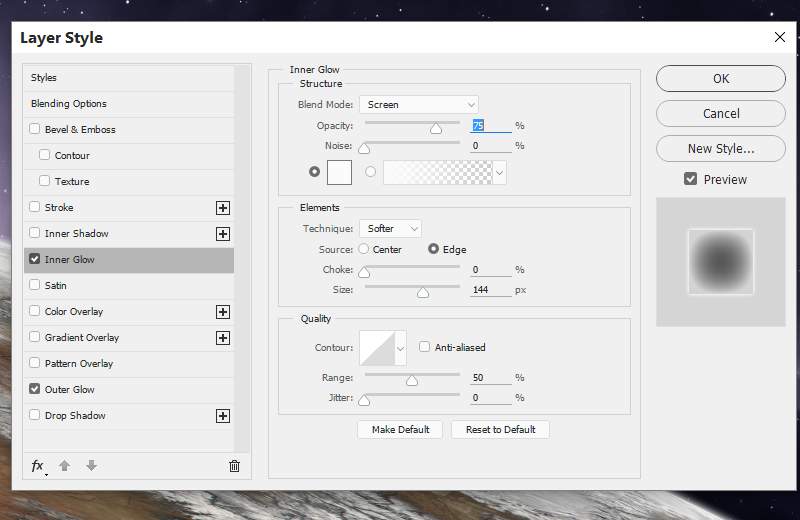
To add some glow to this planet, double-click this layer, choose Outer Glow and Inner Glow. Set the color of glow to #fcfcfc .
How to Create a Sci-Fi Space Scene With Adobe Photoshop 10

How to Create a Sci-Fi Space Scene With Adobe Photoshop 11

How to Create a Sci-Fi Space Scene With Adobe Photoshop 12


Step 9

Hit Ctrl+G to make a group of this planet. Change this group’s mode to Normal 100% and create a Hue/Saturation adjustment layer within the group. Name this group “planet 1”.
How to Create a Sci-Fi Space Scene With Adobe Photoshop 13


Step 10

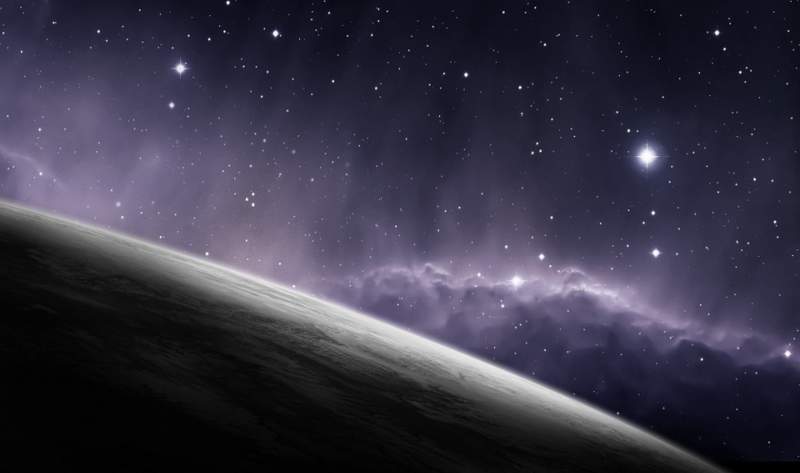
Make a new layer, use a soft brush with the color #000205 to paint the shadow of the planet. Leave the bright side on the front of the planet.
How to Create a Sci-Fi Space Scene With Adobe Photoshop 14

Step 11

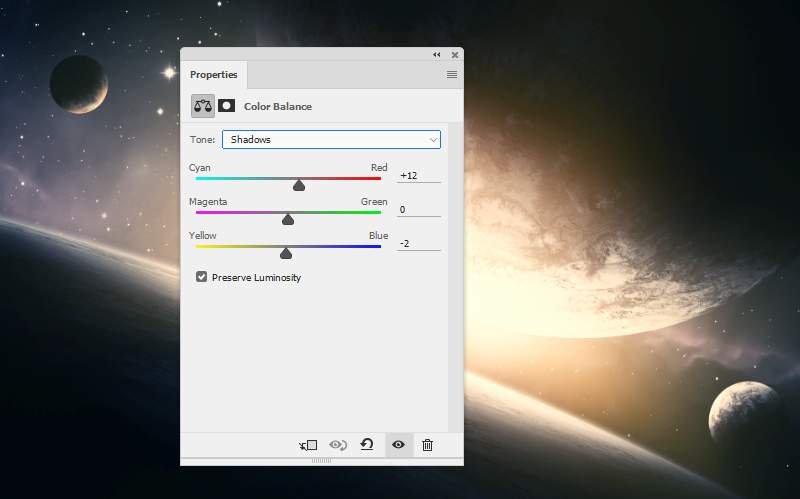
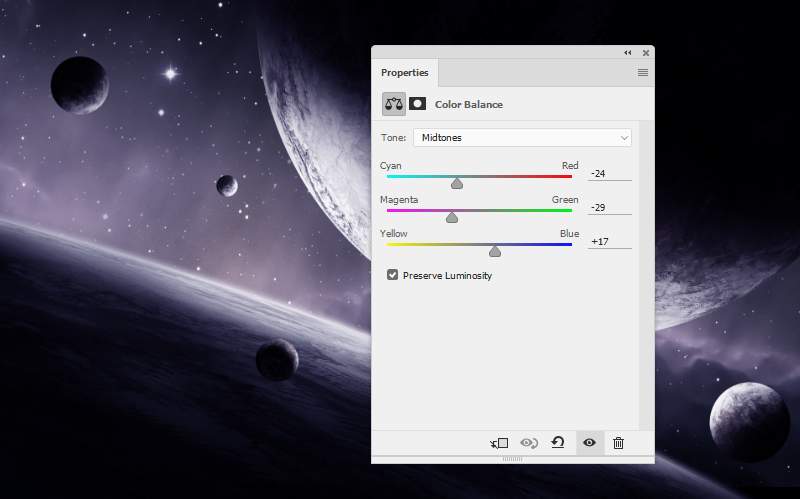
Create a Color Balance adjustment layer and change the Midtones settings:
How to Create a Sci-Fi Space Scene With Adobe Photoshop 15


Step 12

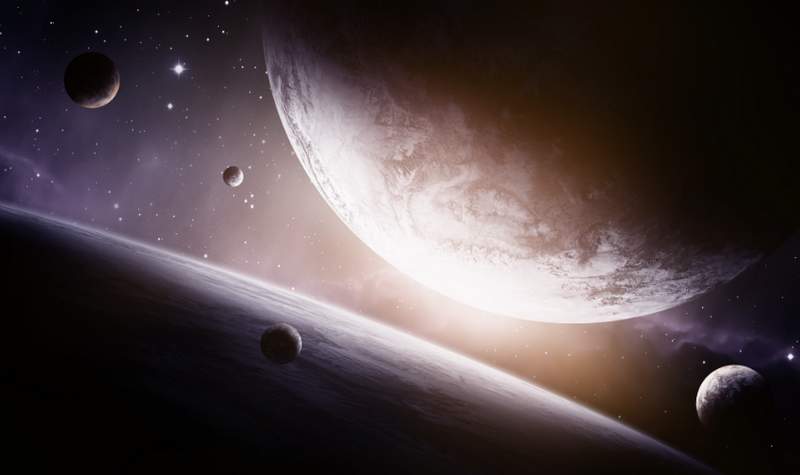
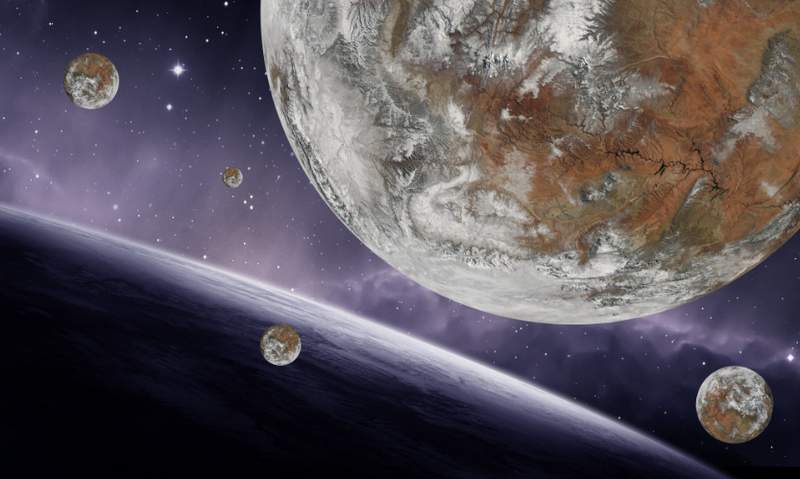
Add more planets to the main file. Duplicate and scale them in different sizes. Place the biggest in the top right and small others around, in the background and foreground. Remember to set these planet layers above the planet 1 group.
How to Create a Sci-Fi Space Scene With Adobe Photoshop 16


Step 13

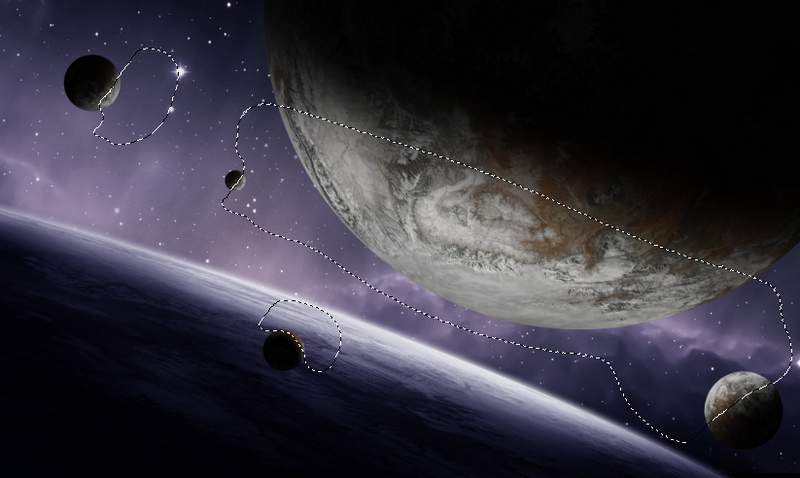
Create a group of these planet layers and use a Curves adjustment layer to darken them.
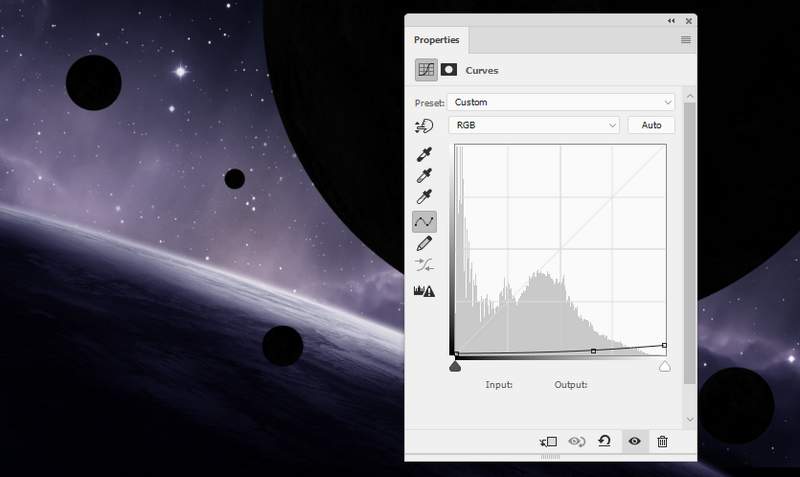
How to Create a Sci-Fi Space Scene With Adobe Photoshop 17

On this layer mask, use a soft black brush to erase the bright part of the planets( which towards the light – see the planet 1 for reference) and leave the dark effect visible on their hidden areas.
How to Create a Sci-Fi Space Scene With Adobe Photoshop 18


Step 14

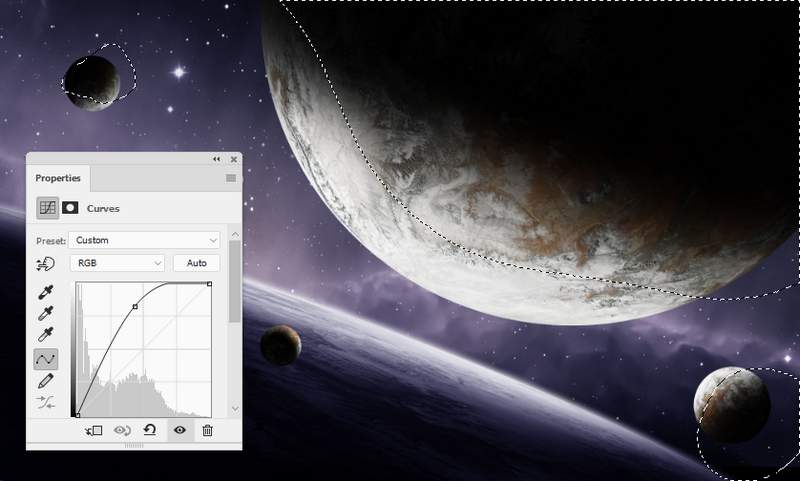
Use another Curves adjustment layer to bring more light to the planets. Paint on the shadow areas of the planets so they won’t be affected by this adjustment layer.
How to Create a Sci-Fi Space Scene With Adobe Photoshop 19


Step 15

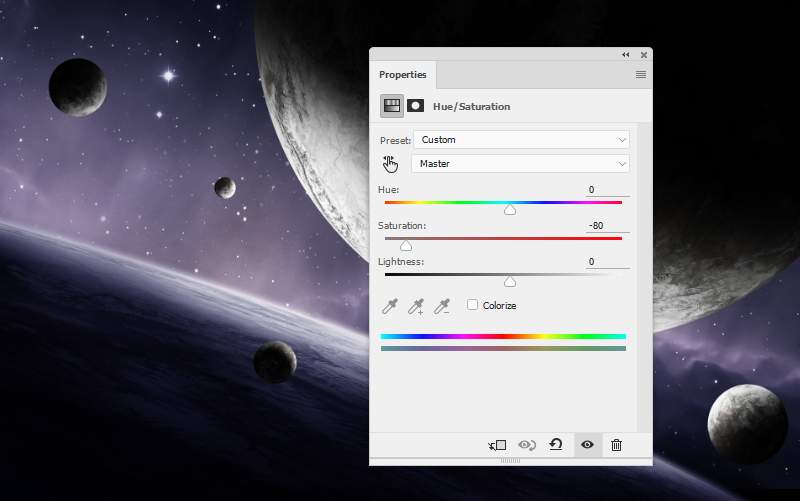
Add a Hue/Saturation adjustment layer to desaturate the planets. Bring the Saturation value down to -80 :
How to Create a Sci-Fi Space Scene With Adobe Photoshop 20


Step 16

Use a Color Balance adjustment layer to match the planets’ color with the background.
How to Create a Sci-Fi Space Scene With Adobe Photoshop 21


Step 17

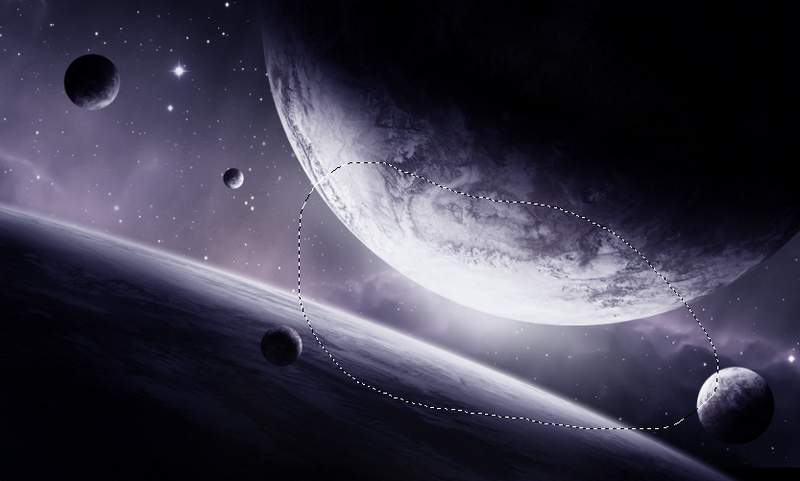
To add more light to the planet on the top right, create a new layer above the planets group. Use a soft brush with the color #f1f3f9 to paint on the bottom of the indicated planet.
How to Create a Sci-Fi Space Scene With Adobe Photoshop 22


Step 18

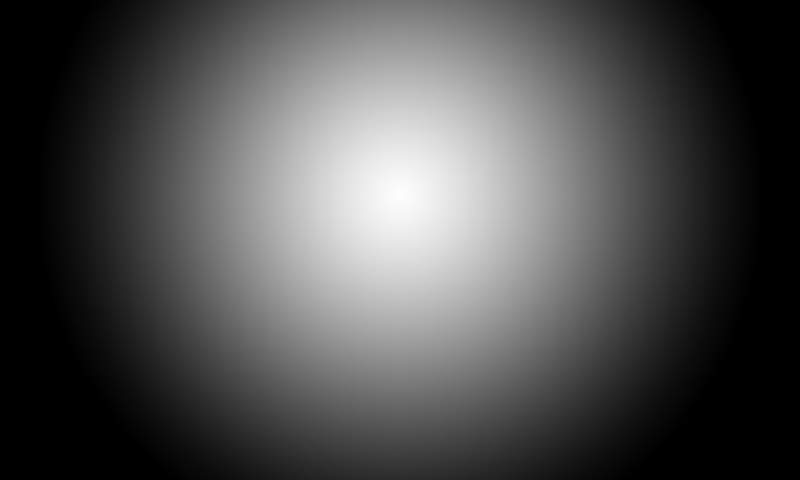
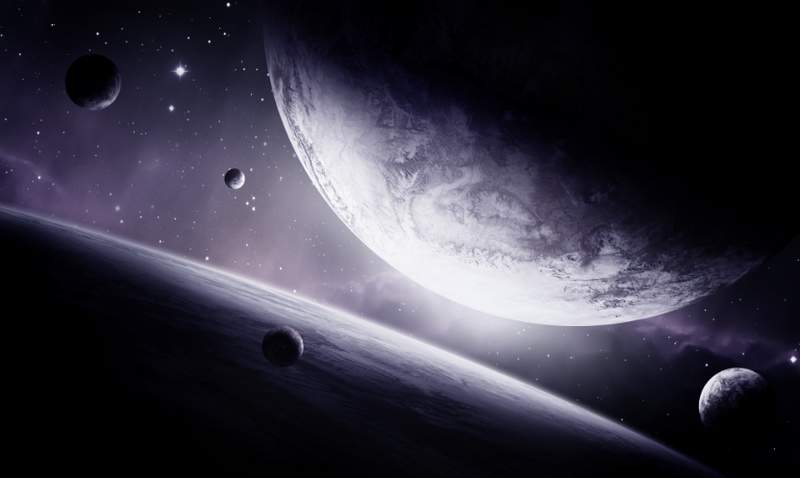
Add a new layer and activate the Gradient Tool (G ). Use Radial Gradient with default colors (black and white) and change this layer mode to Soft Light 100 %. This step is to change the focus of the canvas to the middle area.
How to Create a Sci-Fi Space Scene With Adobe Photoshop 23

How to Create a Sci-Fi Space Scene With Adobe Photoshop 24


Step 19

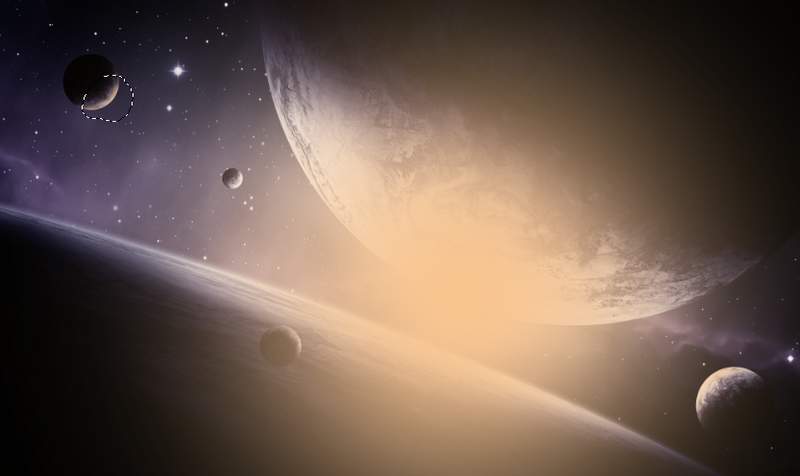
It’s time to add the light. Create a new layer on top of the layers and use a soft brush with the color #f7c590 to paint on the middle and the small planet on the top left. Change this layer mode to Hard Light 100% and use a layer mask to clean the effect on the top and bottom of the big planets.
How to Create a Sci-Fi Space Scene With Adobe Photoshop 25

How to Create a Sci-Fi Space Scene With Adobe Photoshop 26


Step 20

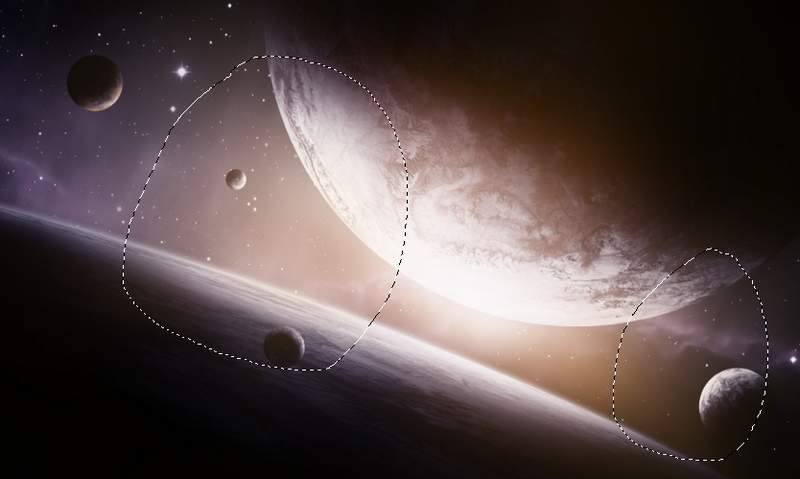
Make another layer and use the same brush to paint some yellow light around the middle.
How to Create a Sci-Fi Space Scene With Adobe Photoshop 27


Step 21

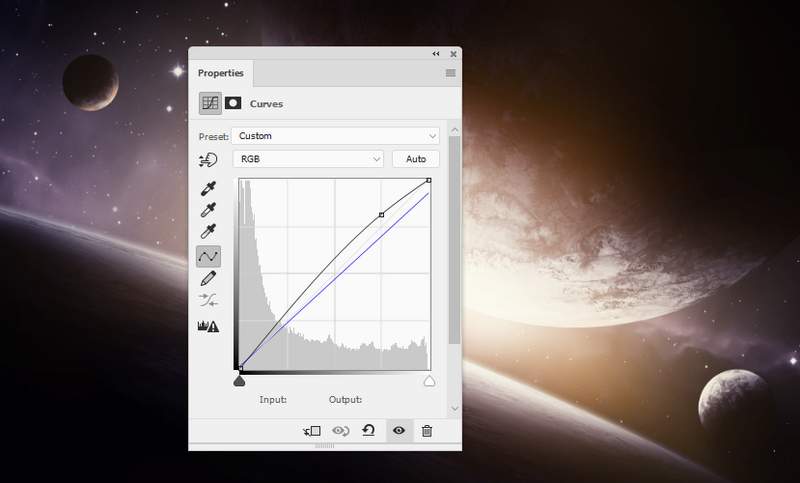
Make a Curves adjustment layer on top of the layers to change the light color of the whole scene a bit.
How to Create a Sci-Fi Space Scene With Adobe Photoshop 28


Step 22

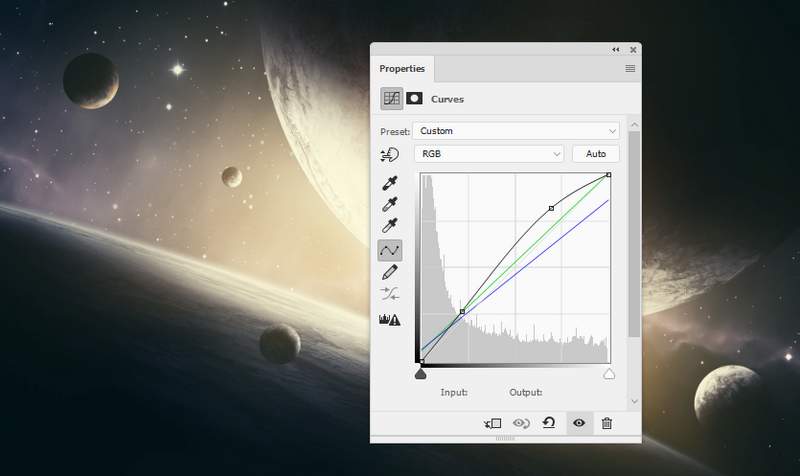
Add another Curves adjustment layer with the same purpose.
How to Create a Sci-Fi Space Scene With Adobe Photoshop 29


Step 23

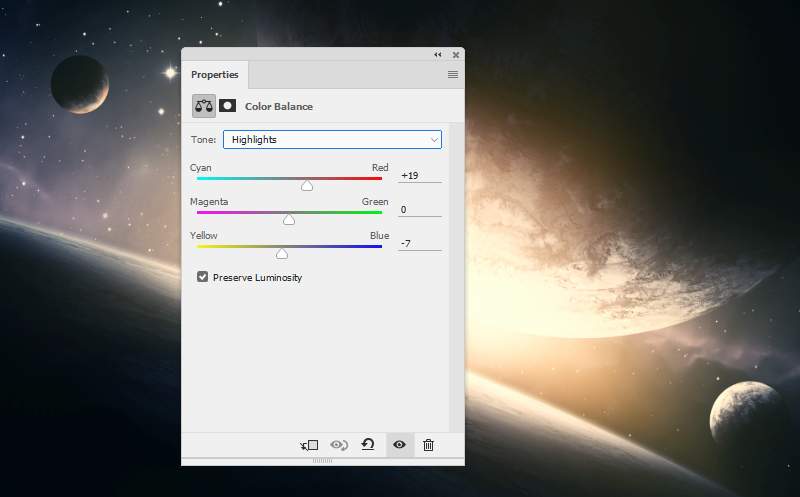
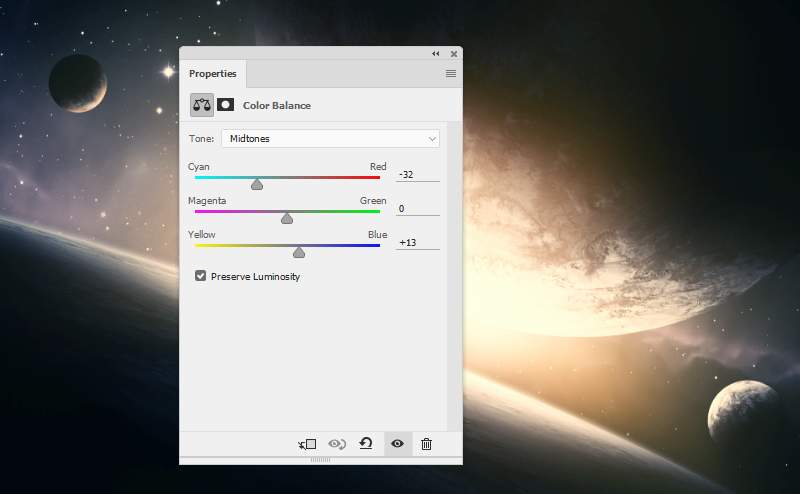
Use a Color Balance adjustment layer and adjust all the values of Midtones, Shadows and Highlights.
How to Create a Sci-Fi Space Scene With Adobe Photoshop 30

How to Create a Sci-Fi Space Scene With Adobe Photoshop 31

How to Create a Sci-Fi Space Scene With Adobe Photoshop 32


Step 24

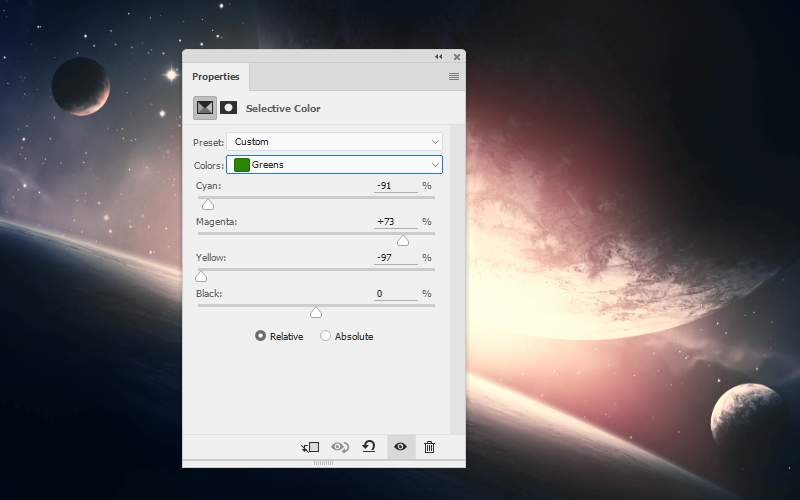
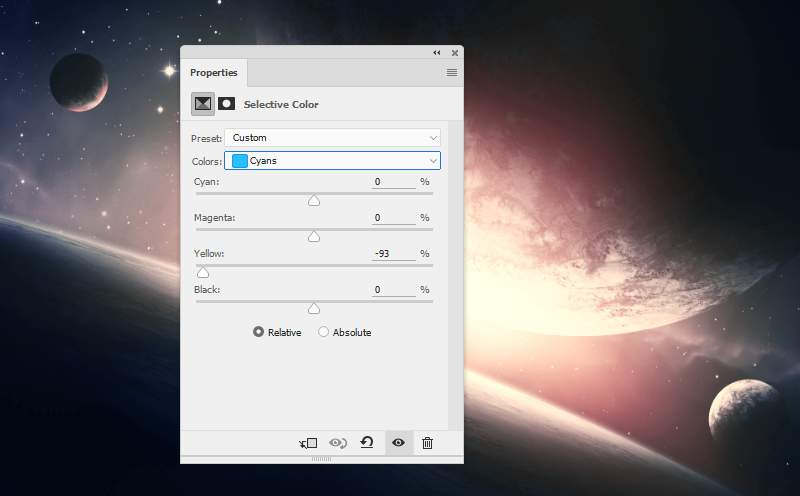
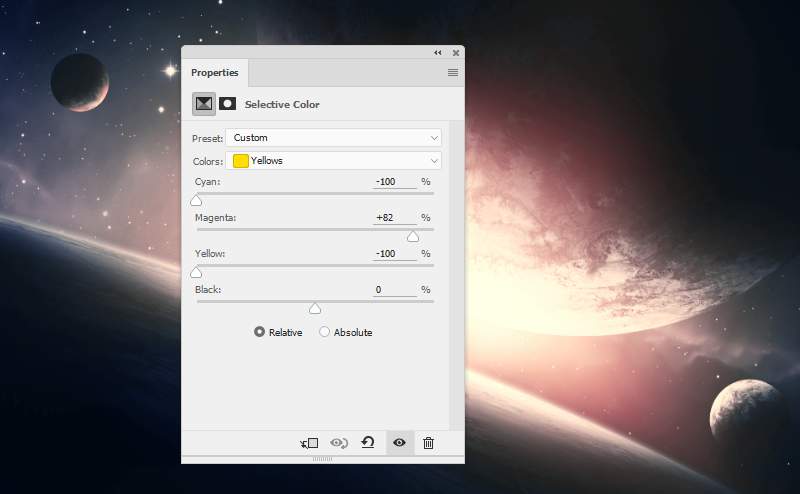
Add a Selective Color and work on Yellows , Greens and Cyans settings:
How to Create a Sci-Fi Space Scene With Adobe Photoshop 33

How to Create a Sci-Fi Space Scene With Adobe Photoshop 34

How to Create a Sci-Fi Space Scene With Adobe Photoshop 35


Step 25

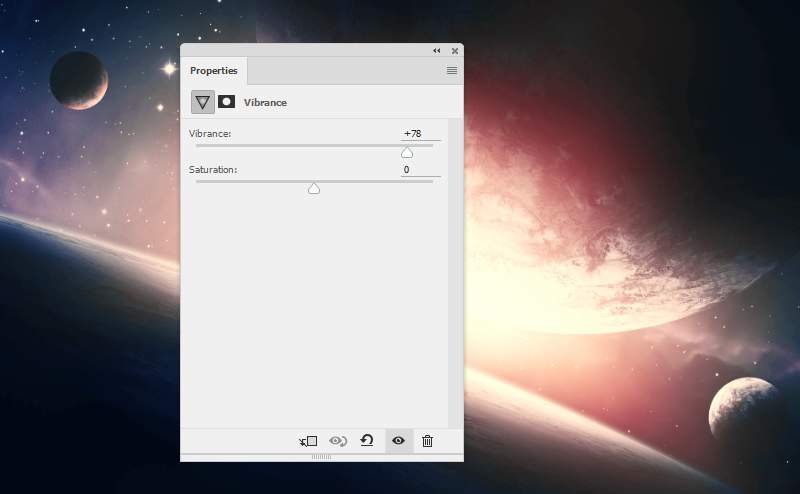
Use a Vibrance adjustment layer to enhance the final effect.
How to Create a Sci-Fi Space Scene With Adobe Photoshop 36


And We’re Done!

I hope that you enjoyed this tutorial.
How to Create a Sci-Fi Space Scene With Adobe Photoshop

02:56:00

Realistic View Wooden Applique


In this quick Photoshop tutorial, we’ll be designing our own realistic view wooden applique. This is a basic tutorial, however, I won’t exactly be detailing all the tools, etc. in-depth so much, so this might be suitable for new Photoshop users.

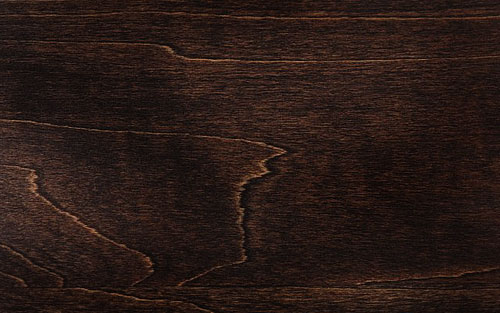
In the beginning, you need to find some appropriate wooden textures. You can do this using Google Images or use this one image. Open up this image and begin to stylize it a little bit. Select the Burn Tool (Brush: 200 px, Range: Midtones, Exposure: 30%) to add dark spots of any shape.


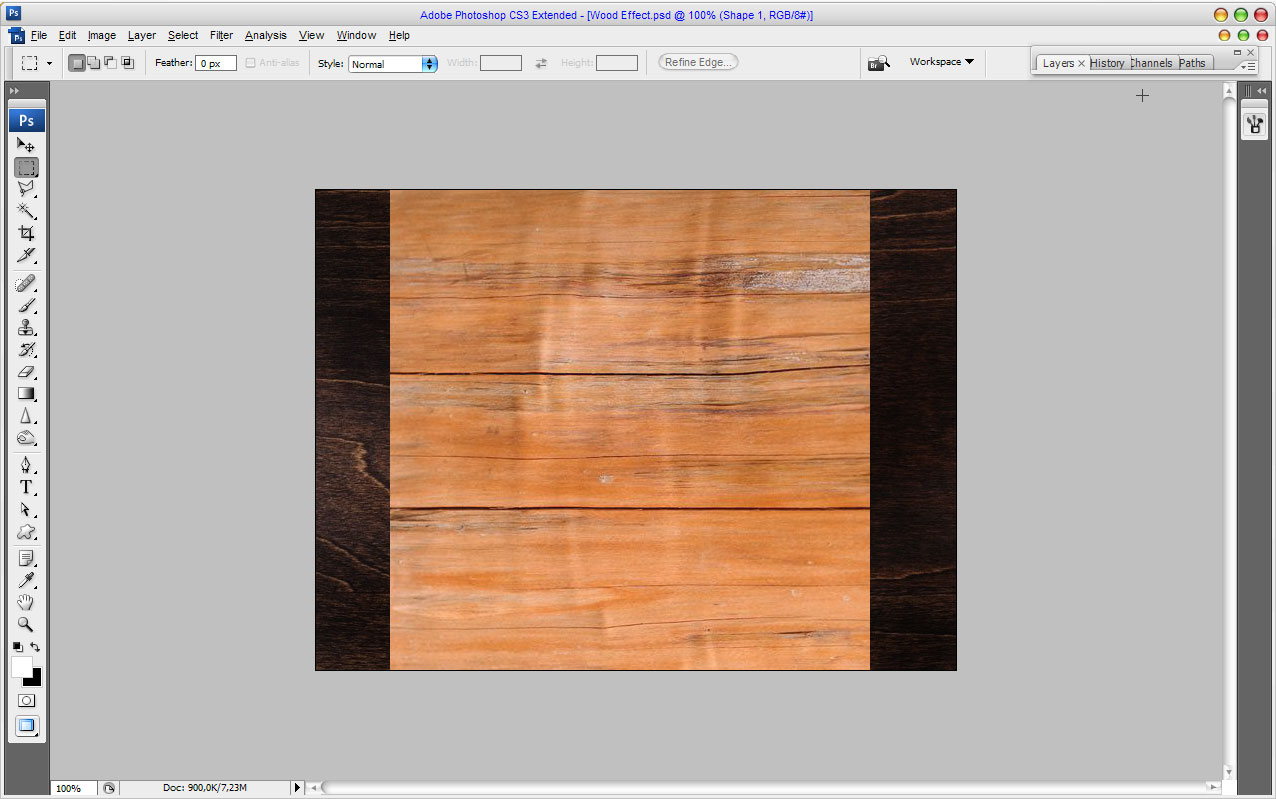
Okay, start with creating the applique. First of all, find a good wooden texture that will be brighter than the background to create applique from it. I think this one will be good. Open up this texture and bring it to the main canvas, then rotate it 90 degrees using Edit > Transform > Rotate 90 CW as in my picture which you can see below.


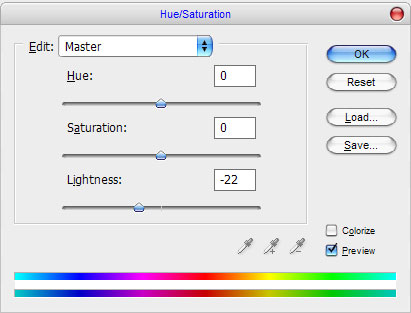
Now, you’ve got the canvas that is so bright for the background. Try to decrease brightness for the current layer with Image > Adjustments > Hue/Saturation:


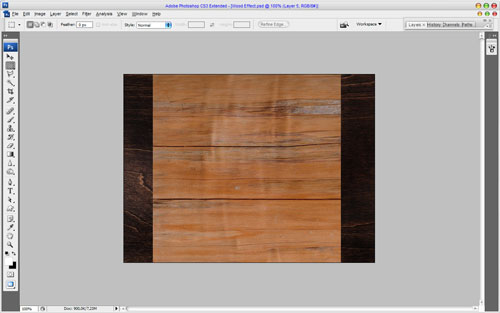
Now it looks better, than before:


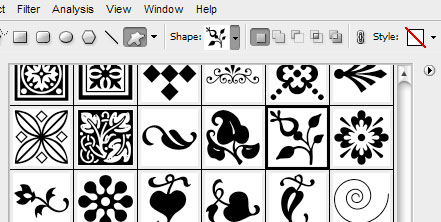
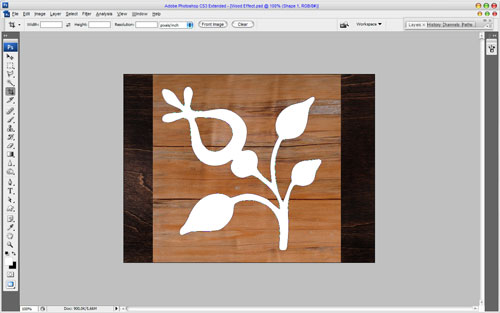
Okay, move to the next step. You need to find a good shape for applique. Get out the Custom Shape Tool to find the right shape on the standard Photoshop shape gallery. I tried this one:


Drag it onto your canvas like I’ve done in the below screenshot:


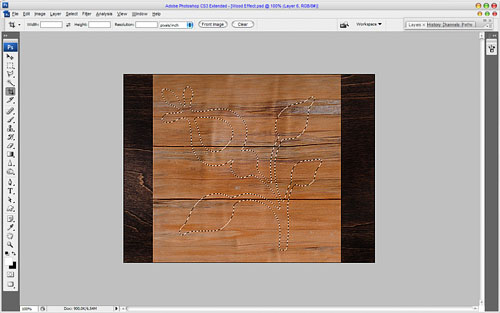
Now, make the shape selection (Ctrl + Left click on this layer on layer thumbnails), after removing the current shape layer, we don’t need it anymore.


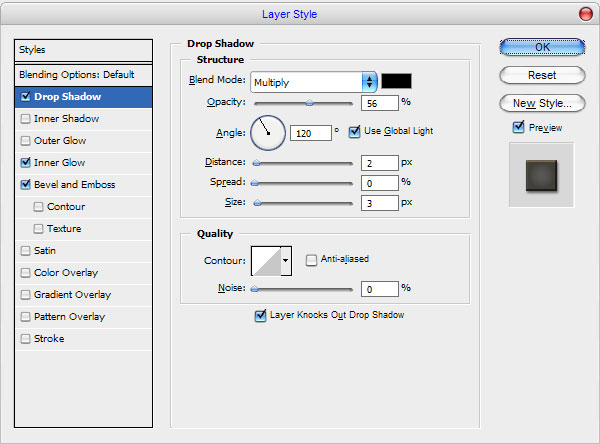
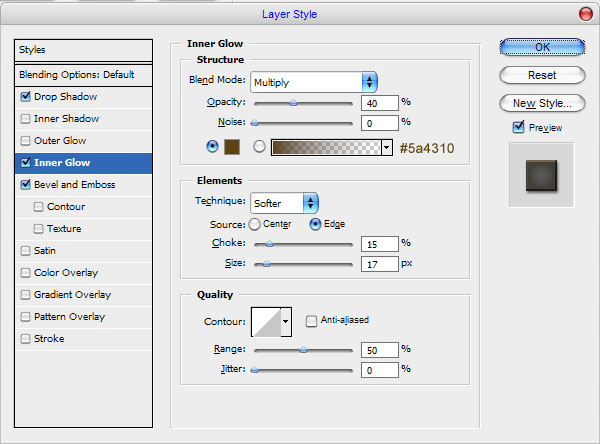
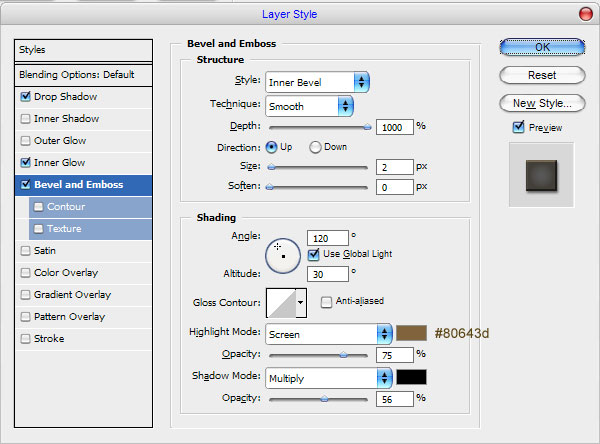
Move the layer automatically and press Ctrl+Shift+J to cut the selected area to the new layer. Remove the layer under the applique. The next thing to do is: apply the following Blending Options to the current layer:
Drop Shadow
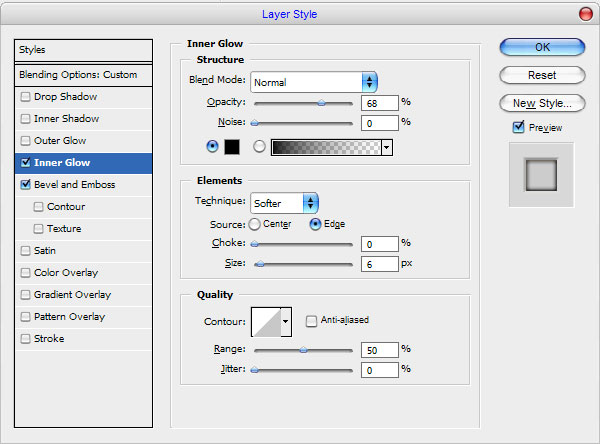
Inner Glow
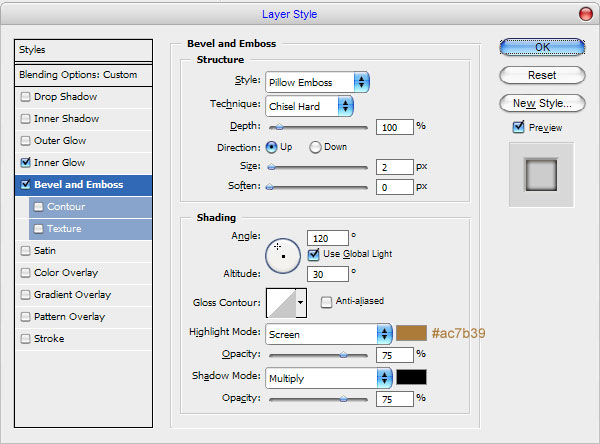
Bevel and Emboss


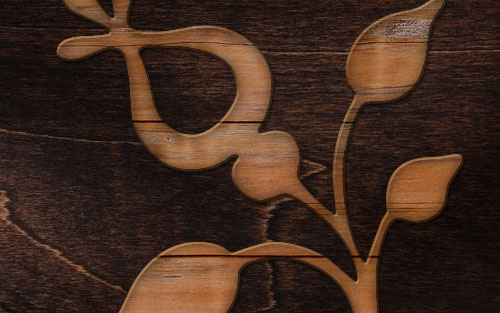
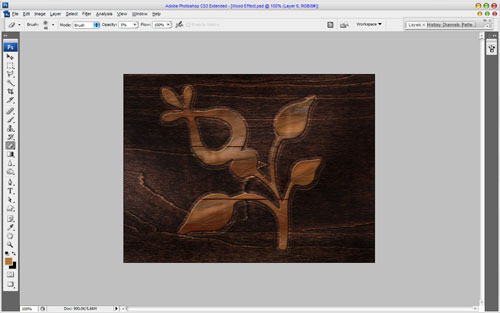
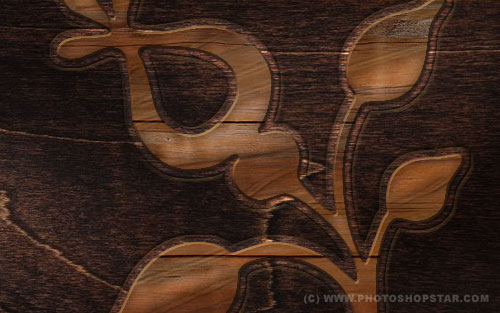
You can see the result below:


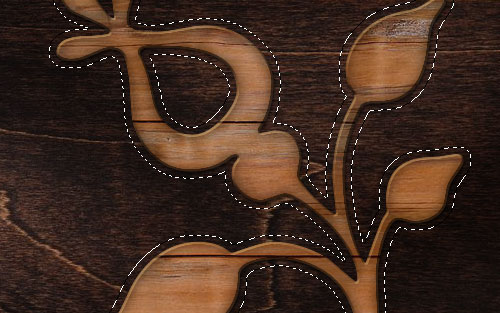
Okay, move to the next step. Load the applique shape with Select > Load Selection and expand this selected area about 7 px with Select > Modify > Expand.


Create a new layer below the current layer and fill the selection with white color.


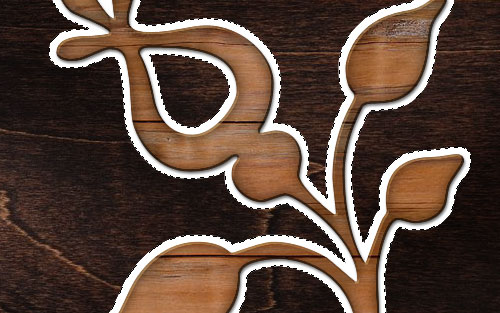
After that remove the selection with Select > Deselect and change layer mode to Overlay. Then apply the following Blending Options to the current layer:
Inner Glow
Bevel and Emboss


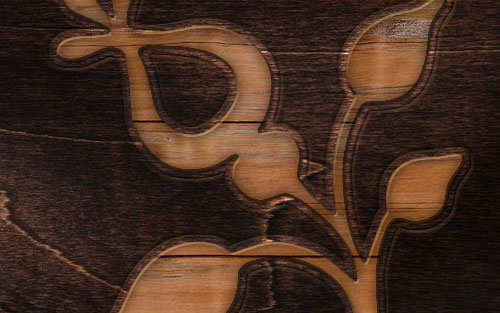
See the difference below:


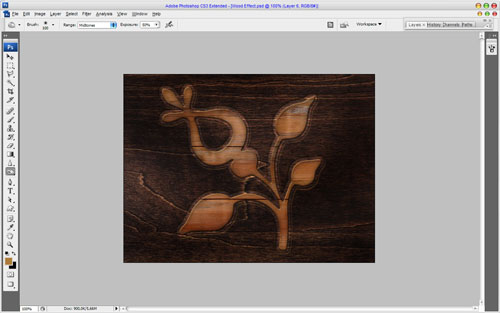
Okay, and the last thing we need to do: is go back to the layer with wooden applique and start a little dodge-work. Using the Dodge Tool with moderate settings (Brush: 100 px, Range: Midtones, Exposure: 50%) do a little bit of dodge-work on the wooden shape.


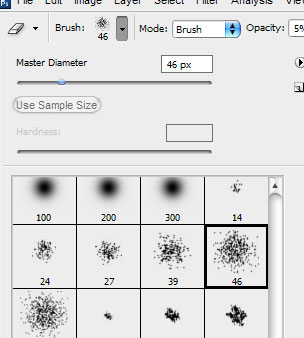
After that select the Eraser Tool and find the right shape on the standard Photoshop shape gallery. I tried this one below:


Set up the eraser opacity to 5% and start to make a little clear work.


That is it for now. We are done with this tutorial! Hope you like this tutorial.