Using the Perspective tool, perspective deformation, and guidelines to create a sports car in one-point-perspective
This tutorial will demonstrate how a rough sketch of a car can be drawn in perspective with CorelDRAW. A basic knowledge of Guidelines, the Toolbox, and experience with drawing lines and curves is required.
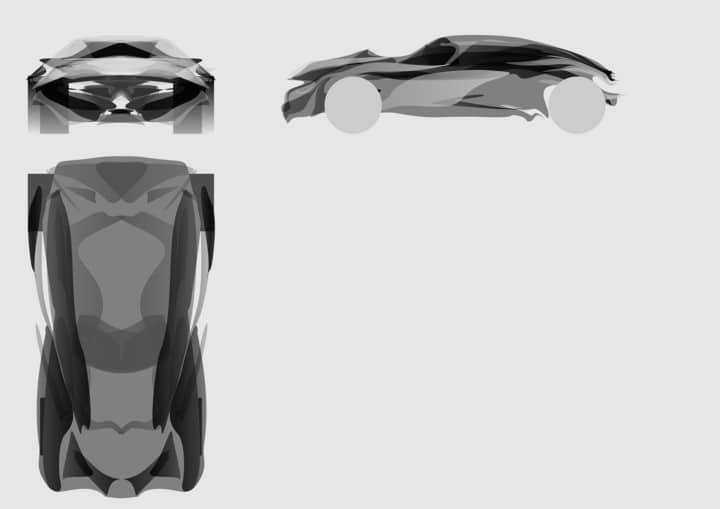
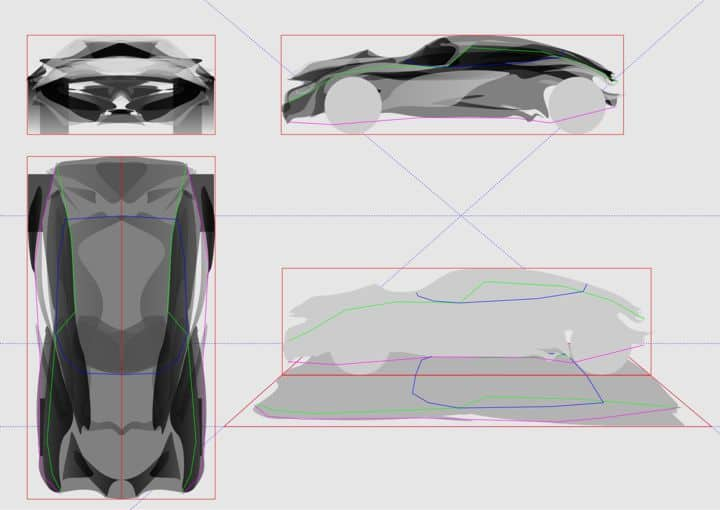
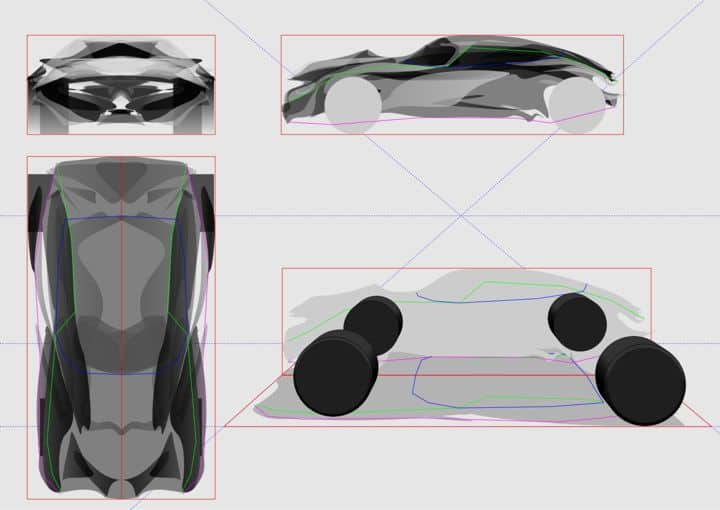
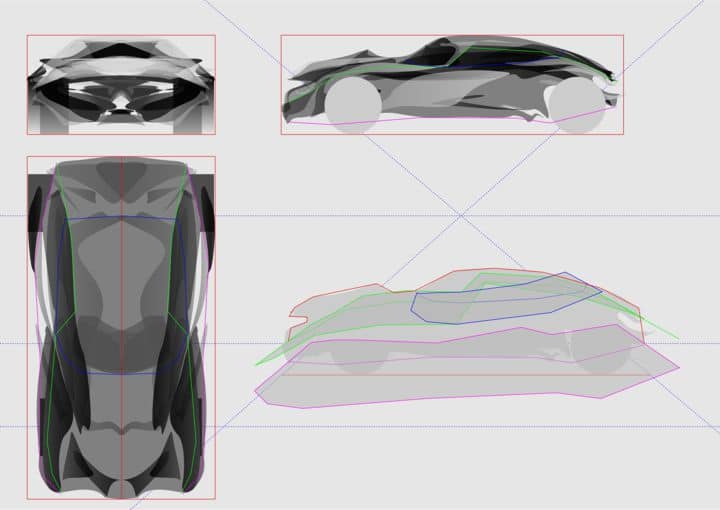
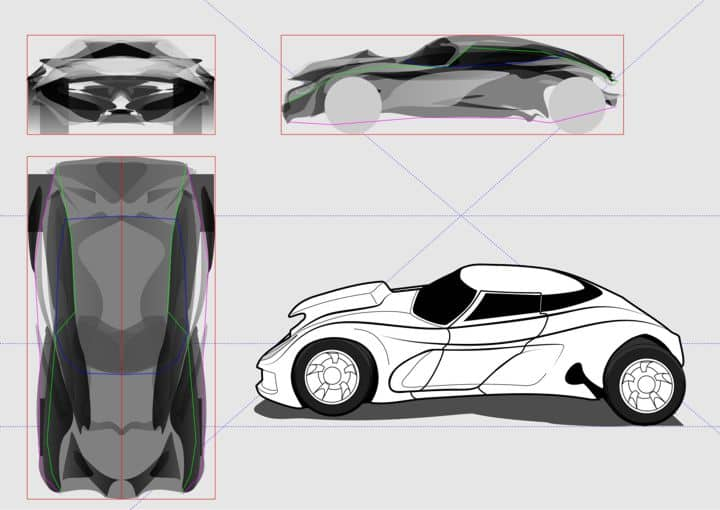
The three views in the image below are aligned in such a way that the size and proportion of the car are consistent throughout all views. Whichever reference you use, pay the most attention to the wheels of the car, since they should be consistent, simple forms.
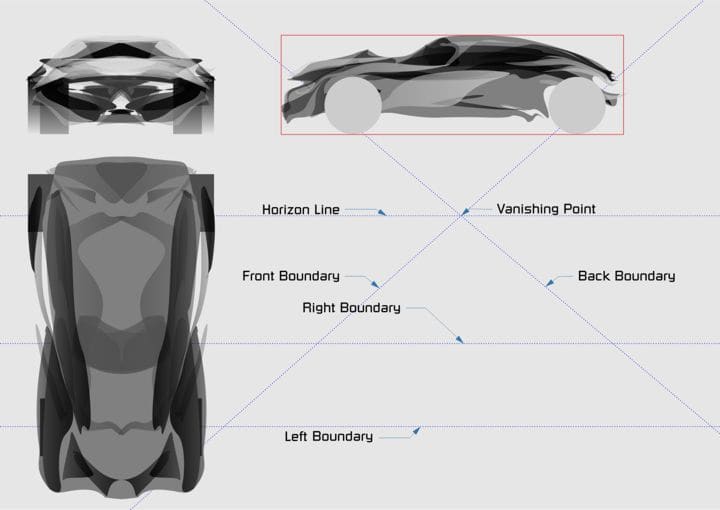
In this Perspective, I have decided to draw the car as seen from the left side, with a part of the top planes (the hood and the roof), visible. Regarding this presentation, ALL virtual lines are perpendicular to the side ‒ like the two axes connecting the wheels ‒ and converge to the one Vanishing Point that lies on the Horizon Line.
I need to place three additional Guidelines. They can be placed freely to restrict my drawing area: The Left Boundary, which is the very outer line of the left side of the car, and the Front and Back Boundaries, which indicate the very front and rear side of the car.
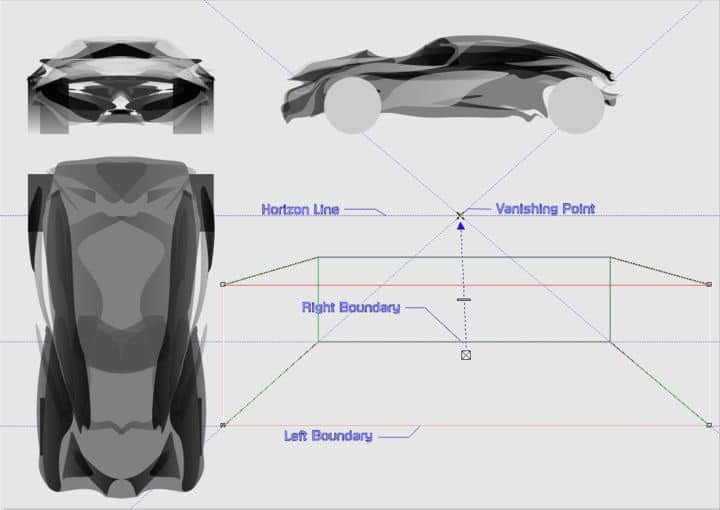
In order to retrieve the Right or far side Boundary, we draw a bounding rectangle around the car in Side View first. Move it down and enable View > Snap To > Snap to Guidelines and fit the lower left point to the intersection of the Front and Left Boundary. Resize the rectangle uniformly, until the bottom right corner is on the intersection of the Back and Left Boundary. The bottom side of the rectangle becomes the Left or near side Boundary.
Now we will use the Extrude Tool (Toolbox > Extrude tool), to create a box with a depth of 40 units, you can set this in the Properties Bar of the Extrude Tool. Make sure you drag from the center of the bounding rectangle copy to the Vanishing Point.
If you have no fills enabled, you will already see the far side bottom edge. Drag a Guideline from the Ruler and align it on the bottom far side edge. After that, you can delete the whole box, and we will later use more efficient tools for the perspective construction.
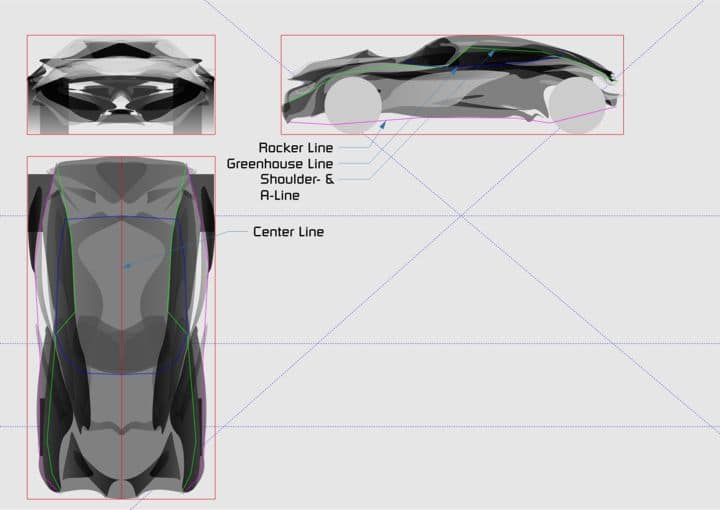
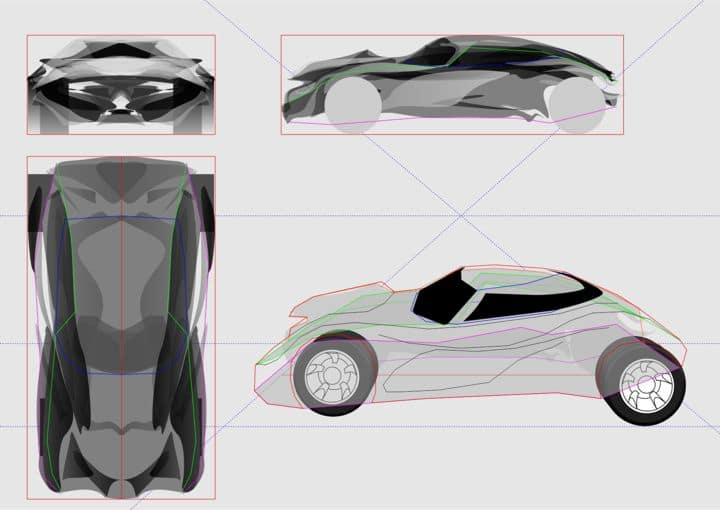
In Automotive Design, there are certain terms used throughout every design, which indicate the characteristics that all cars have in common, regardless of type and shape. In our design, we will indicate three major lines, which the Top and Side Views have in common, to help us in projecting points into perspective.
These lines are:
- The Rocker Line (magenta) for the entire bottom line, starting at the front bumper and ending at the rear bumper.
- The Greenhouse Line (blue) goes around all windows like the windshield, side windows, and rear shield.
- The Shoulder Line and A-line (green) start at the front bumper, follow the hood go up the A-pillar, and follow the roof back over the trunk to the rear bumper. Notice that the Shoulder/A-Line doesn't necessarily follow the silhouette of the car, especially at the hood and the roof.
Since value changes in 2D indicate form changes in 3D, I only used my orthogonal sketches sporadically. I also added boundary rectangles and a centerline in the Top View. We will need the centerline later for symmetric projection purposes.
Once the Character Lines are established, I duplicate the Top View first, including the Character Lines and Boundary Rectangle, and rotate it by 90 degrees (use the rotation settings in the Property bar). In the duplicate, I created a boundary of the car for a clear silhouette, with Arrange > Shaping > Boundary.
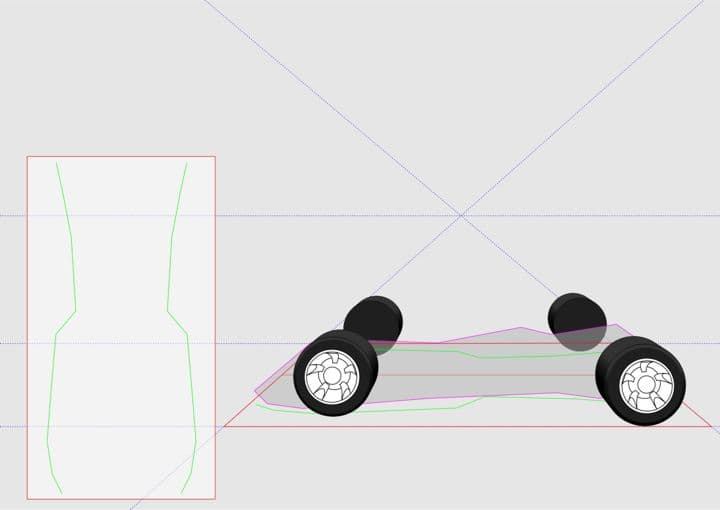
With the Duplicate selected, I apply a perspective effect with Effects > Add Perspective, and move the four corners to match my Ground Plane.
The same is repeated for the Side View (except the perspective distortion), and I put the Side View Duplicate with the bottom edge onto the ground plane centerline (now correctly located in perspective).
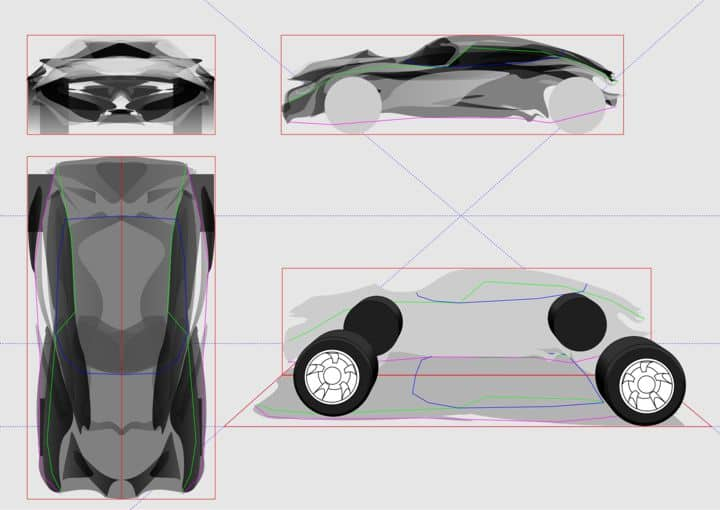
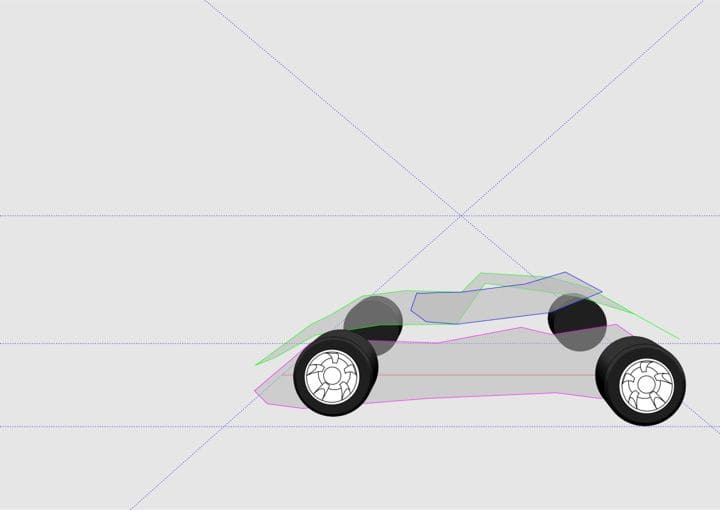
The wheels need some rims too, but I'll not cover the creation of those here since it would be out of focus for this tutorial.
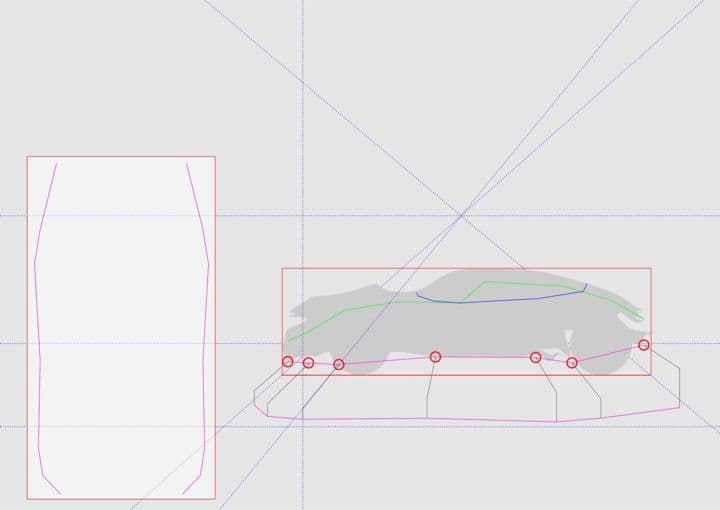
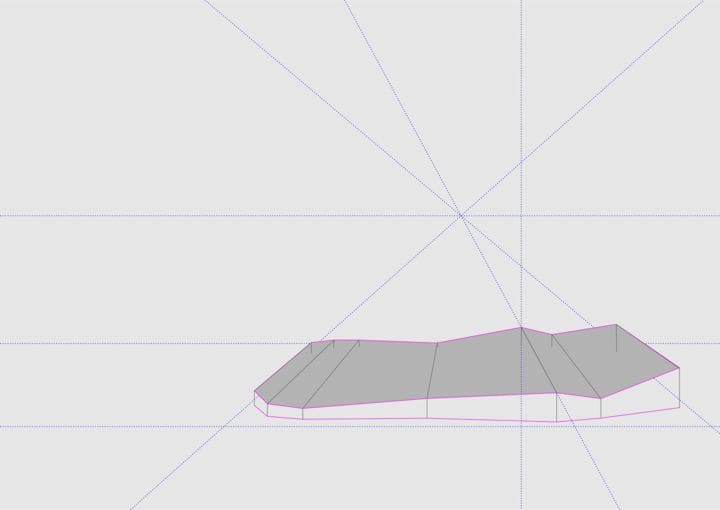
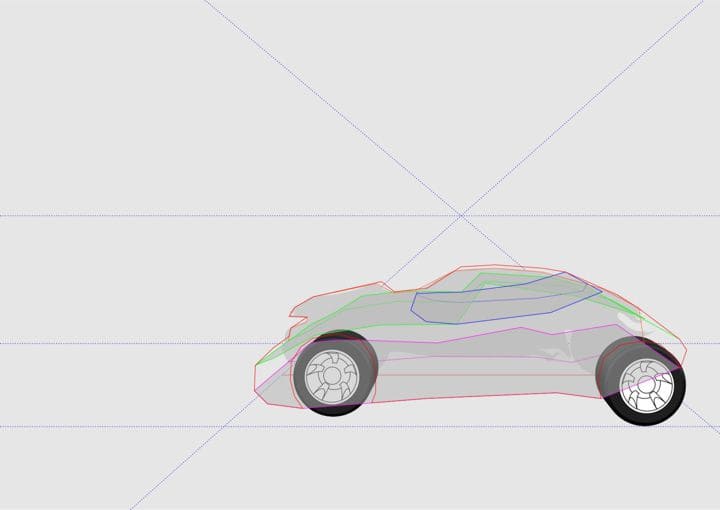
We will continue with the projection of the Character Lines of the car into perspective. I'll start with the magenta Rocker Line.
First, I created two additional Guidelines. One will end up in the Vanishing Point (the Rotation Center ‒ accessible by double-clicking on the Guideline ‒ needs to be moved and snapped onto the Vanishing Point). The second Guideline is used as a vertical axis to project the points up.
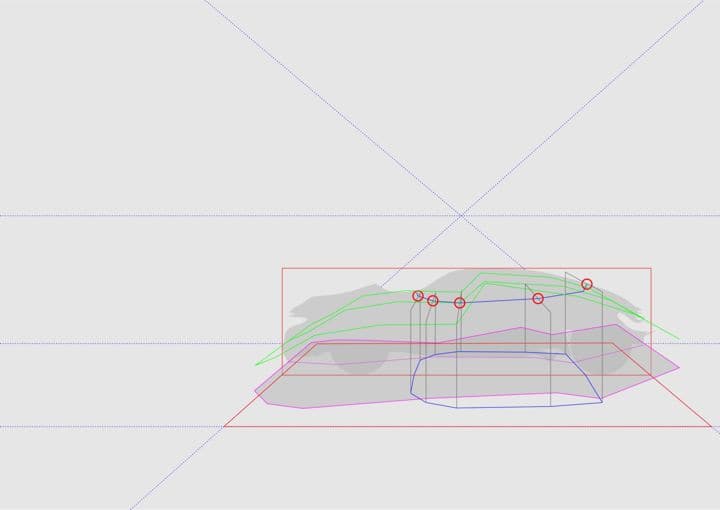
For each Node on the Rocker Line Curve, I follow a strict process:
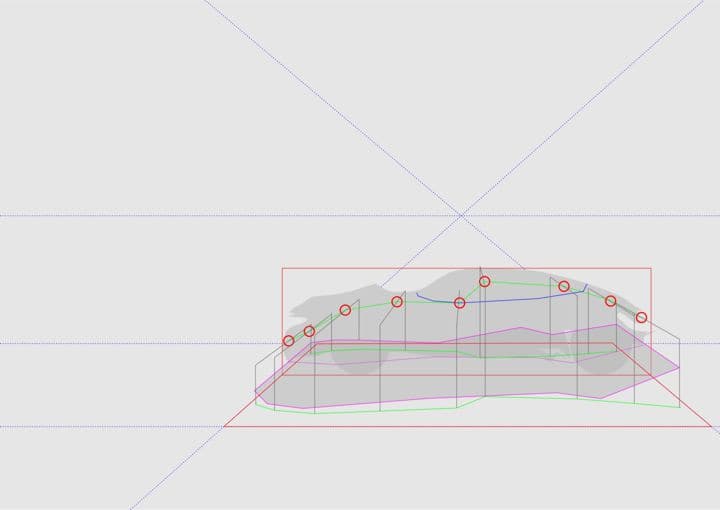
- I rotate the vanishing Guideline and let it snap on the Node of the Centerline Section Cut Rocker Line (Snap to Objects need to be enabled for this, (press ALT+Z). The Nodes are indicated with red circles in the bottom image.
- I move the vertical Guideline and let it snap to the related Node in the Ground Plane Reference, on the Rocker Line Curve, next to the viewer.
- Where both the vanishing Guideline and the vertical Guideline meet, the Node will be correctly located in the perspective construction.
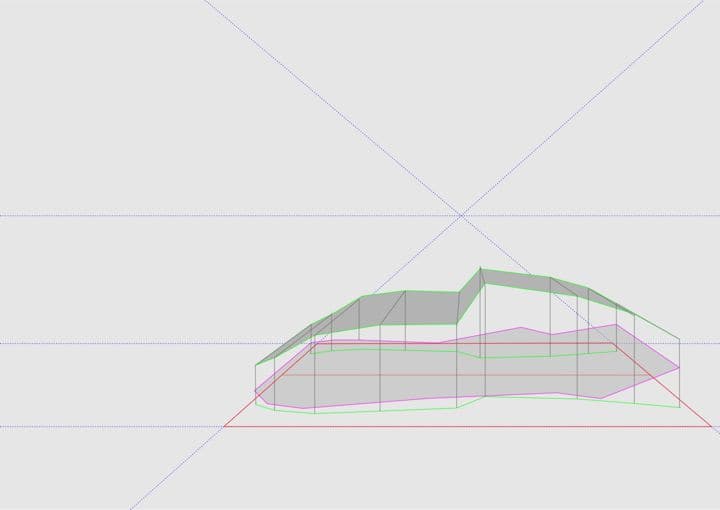
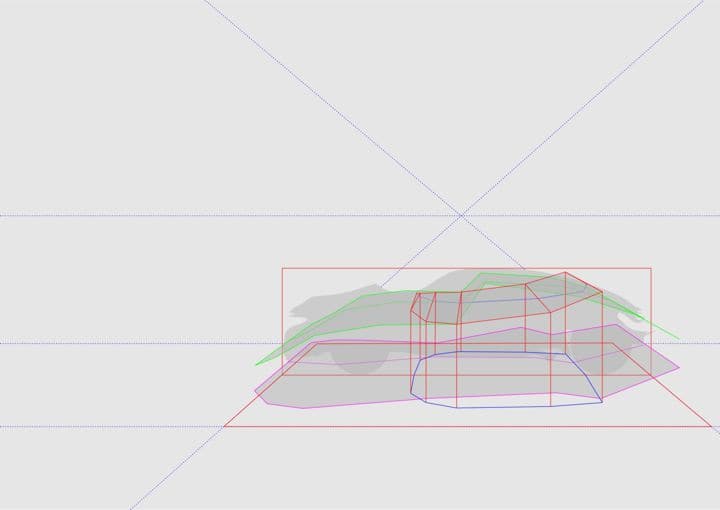
The same process is also repeated for the Shoulder/A-Line Curve and the Greenhouse Line Curve.
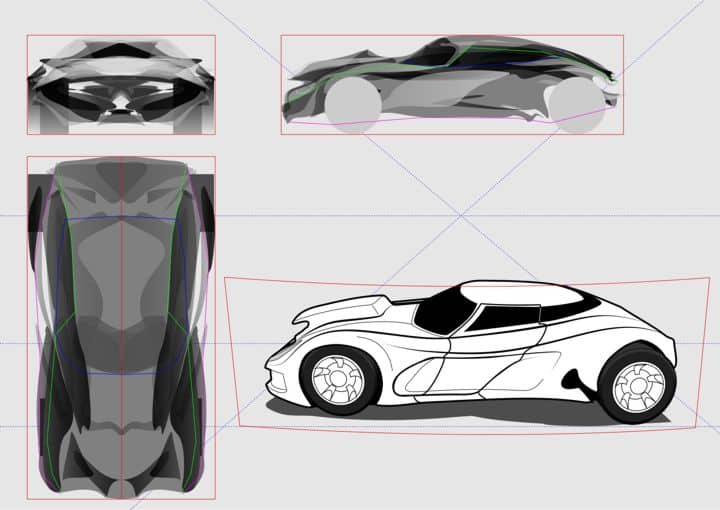
Create a boundary rectangle of the perspective drawing and convert it to curves (CTRL+Q). Move the bottom corners closer to each other, just a bit, to simulate a sense of vertical convergence. Then convert the Node type of all nodes to Curve Type in the Shape Tool Properties Bar, and drag the upper and lower edge slightly downwards, to achieve an arched look. The entire rectangle should now look like a bent screen in perspective.
Select the car again and go to the Envelope Tool (Toolbox > Envelope tool). In the Properties Bar click on the Eyedropper Icon (Create Envelope From) and click on the rectangle we created in the previous step.
I have used the tools in this tutorial to provide a very flexible way of drawing in perspective. It is even possible to create drawings with two or more Vanishing Points.





No comments:
Post a Comment