In this tutorial, we will be covering some of the most common tasks
facing an Adobe Photoshop user who is transitioning to Corel®
PHOTO-PAINT™. CorelDRAW Corel PHOTO-PAINT and Adobe
Illustrator/Photoshop have many similarities and share some basic
drawing and design capabilities, which makes it easy to move from one
application to the other.
Have you been using Photoshop for a long time? If the answer is "Yes", you will probably want to continue working in an environment that is comfortable and familiar to you. Some users believe that transitioning to CorelDRAW means having to learn a program from scratch, or will mean a drastic change in the way they work. But the good news is that this is not necessary; you can continue working as usual, and even better.
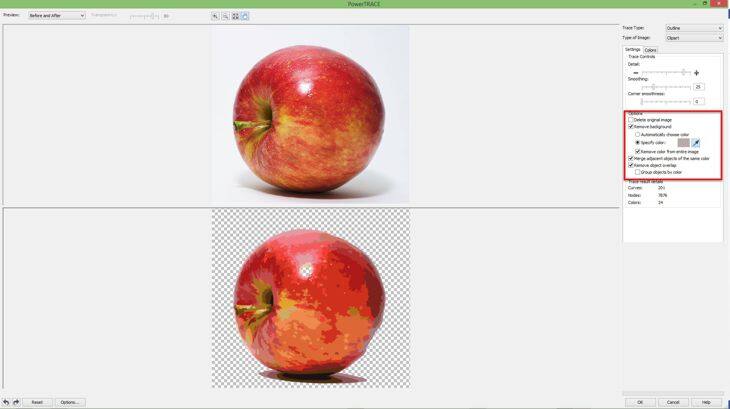
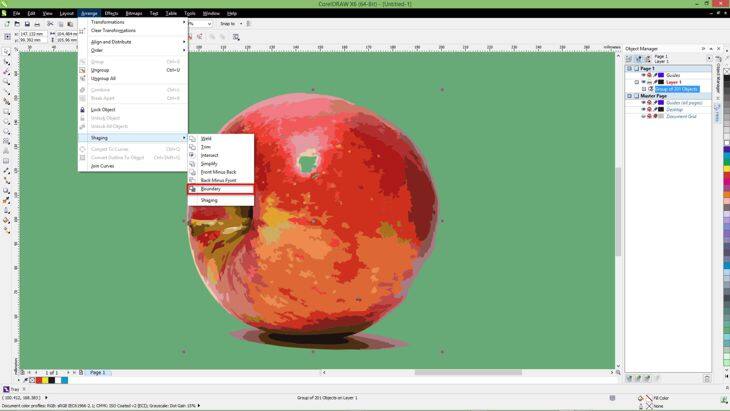
Moreover, you can work with both programs at the same time if you wish. CorelDRAW and Photoshop are good friends. Here we will provide some hints about how to work with both programs. Let's start with one of the basic and most frequent problems: removing the background from an image. Let's use as an example the image of an apple.
How do you remove the background image in Photoshop in preparation for bringing it into CorelDRAW? There are several ways of doing this, of course. For example, you can select the apple, and save the selection as a channel (Select > Save Selection... > select New Channel). That's all!
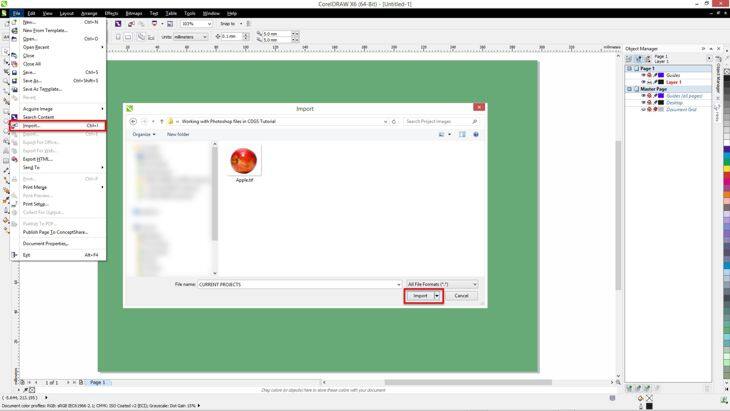
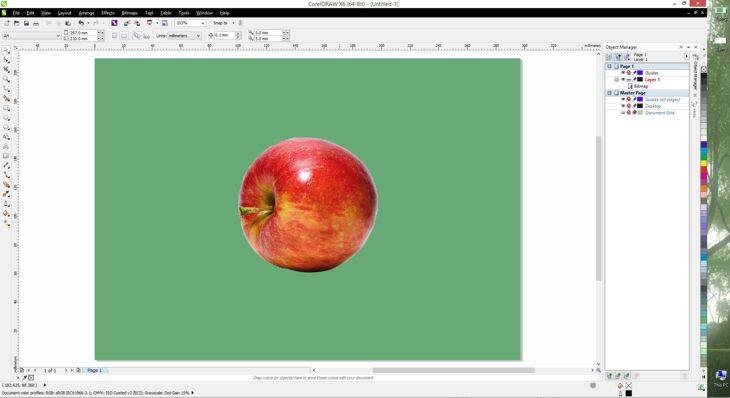
Now, save the image as a . TIF file (note: some file formats such as JPG do not support transparent backgrounds), then import the image into CorelDRAW using the command File > Import (Ctrl+I).
Some Photoshop users prefer to use a Path (a vector mask) for this purpose. Again, this is no problem, if you already have an image with a saved Path or if you want to create a new one (by saving a selection as a Working Path) just go to File > Export > Paths to Illustrator.
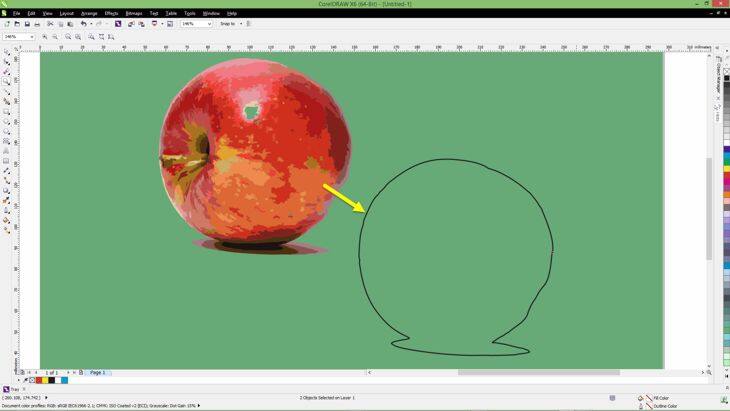
Now, go back to CorelDRAW and import (File > Import), the saved path. The result will be an object without fill and without outline (and therefore invisible). But after importing it, and while the object is selected, choose any color on the Color Palette with the right mouse button to add a new outline.
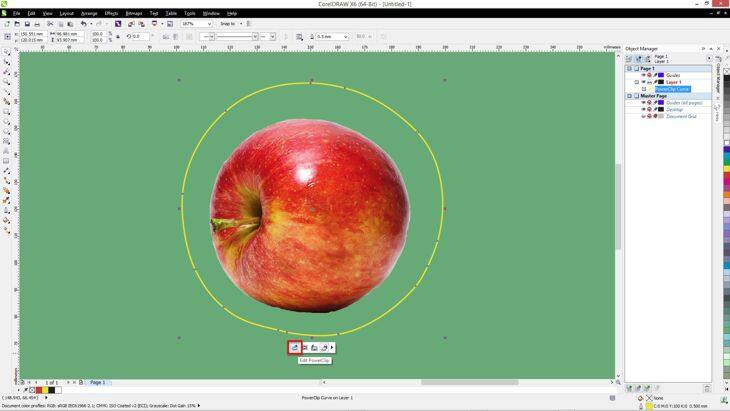
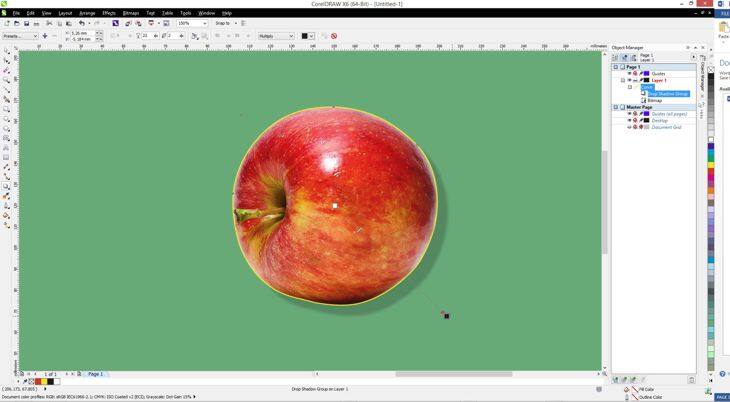
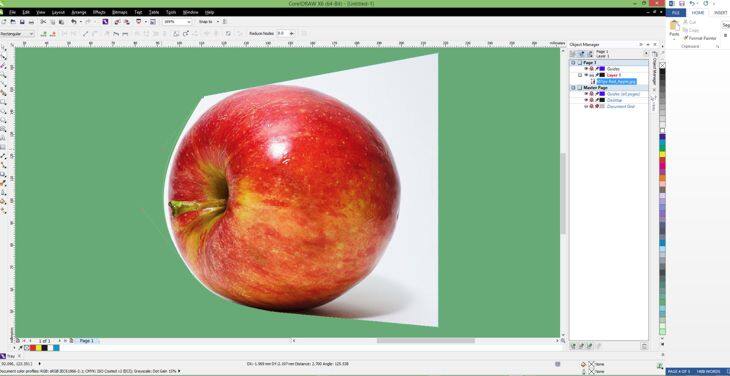
Now, import the Apple image, the original JPG, or a new file after correcting the image with Photoshop. Go to the Effects menu and select Powerclip > Place Inside Frame. An arrow cursor will appear. Click on the border of the path that you imported before, and the apple will be placed automatically inside the powerclip.
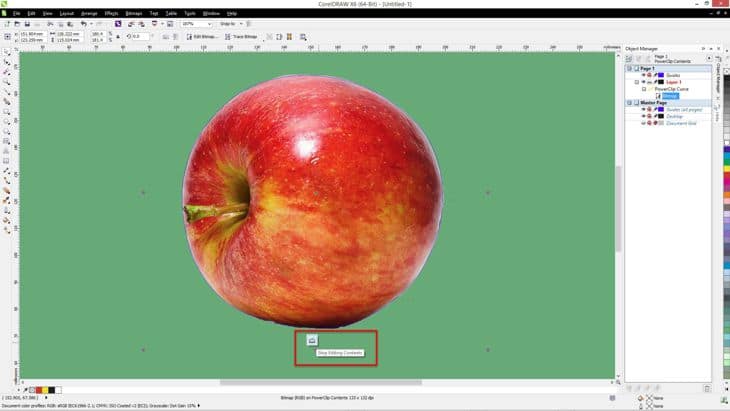
By default, the image should be centered within the powerclip. If the image is not in the correct position, you can reposition it (Alt+click), or you can edit the powerclip contents (Ctrl+click on the powerclip, or right-click the powerclip and choose "Edit Powerclip...") then move and/or resize the apple to fit within the border.
The difference between this last method and the previous two is that the edge in this case is a vector object. You can use the Shape Tool (F10) to correct or modify the object, add an outline, or any other effect you want to it.
All three methods allow you to add a Drop Shadow, a Transparency (if you use Powerclip remember to apply the transparency to the image, not to the container object), and a lot of other effects.
Let's look at three of these: Import the Apple image in CorelDRAW using the command: File > Import, and with the right mouse button choose "Edit bitmap...". This will then open the image with Corel PHOTO-PAINT.
To create a transparent background, we can use a similar method as in Photoshop.
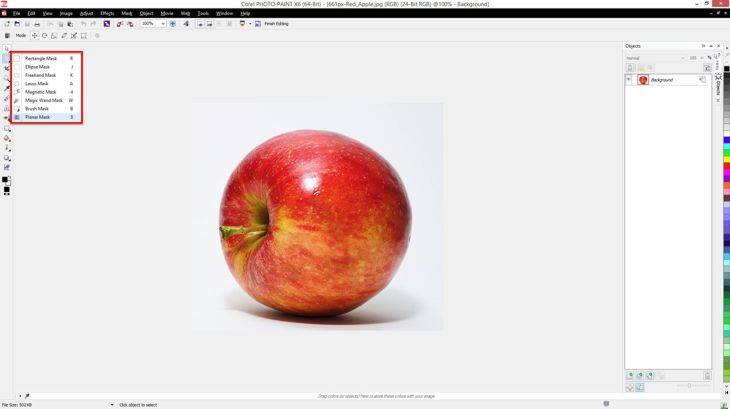
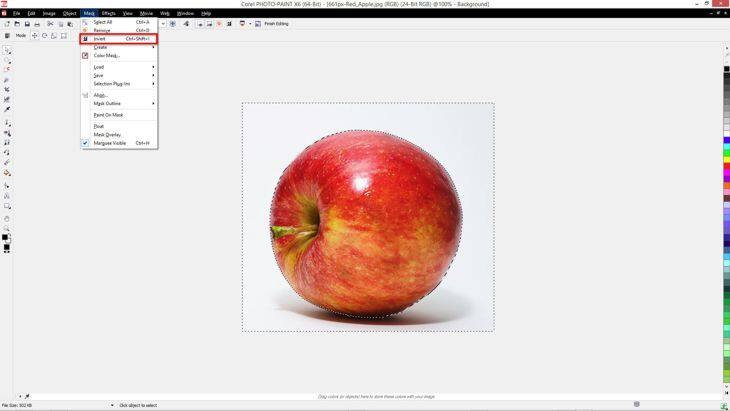
Select the image with the Mask tools, for example, the Magic Wand tool, to select the background. Since we want to select the apple, go to the "Mask" menu (remember, Mask = Select), and choose "Invert" (Mask > Invert or, CTRL+SHIFT+I).
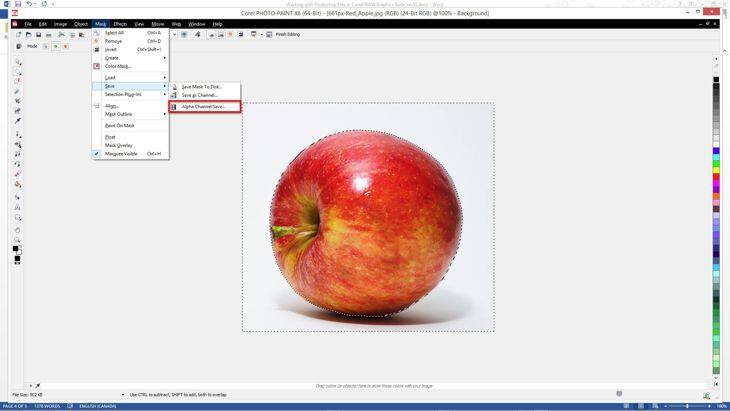
And yes, you can also save the selection in PHOTO-PAINT as an Alpha Channel from within the Mask menu (Mask > Save > Alpha Channel Save...), then save the image as a . CPT file (the native file format of Corel PHOTO-PAINT), .TIF, .PSD, etc. for later use.
As you can see, as an Adobe Photoshop user, you can continue working as you did before, until you become familiar with the new tools of CorelDRAW. You will find many tools similar to those that you are accustomed to working with ... and more. You can use the same color settings in both programs to get the exact result you want (in CorelDRAW see: Tools > Color Management). But most importantly, you can feel confident in the knowledge that CorelDRAW is a safe choice for you to achieve your creative and professional goals.








No comments:
Post a Comment